Webhooks are user-defined HTTP callbacks that enable real-time communication and interaction between OrderCloud and external systems or services. They help automate processes, validate and synchronize data, enhancing the efficiency and responsiveness of e-commerce operations.
There are two types of webhooks in OrderCloud. Pre-hook and Post-hook.
Pre-hook will happen before OrderCloud execute the endpoint given and Post-hook will execute after the given endpoint. Webhooks in Ordercloud only works with write API endpoints (POST, PUT, PATCH, DELETE).
Webhooks in Sitecore OrderCloud can be used for many different purposes like:
- Inventory management: Webhooks can be used to automatically adjust inventory levels in external systems when an order is placed or updated. This ensures accurate inventory tracking and helps prevent stock discrepancies.
- Validation: Pre-hook webhooks can be used to validate incoming requests, such as payment information or customer details, before processing an order. You can also use it to validate shipping addresses using external address validation services or other checkout information before an order is created.
- Data synchronization and third-party integrations: If you need to update or send data to your CRM, ERP or other platforms you can also use webhooks to send that data.
- Automation: Webhooks can be used to automate various e-commerce processes, such as generating invoices, updating shipping statuses, or sending marketing emails based on user behavior.
Webhooks in Sitecore OrderCloud play a crucial role in making your e-commerce solution a success by improving the efficiency and experience.
How to Setup a Webhook
There is a very well documented guide on how to setup webhooks here: https://ordercloud.io/knowledge-base/using-webhooks
But let’s take a look anyway. Go into portal.ordercloud.io, API console and select your marketplace.
Go to Webhooks and create a new Webhook
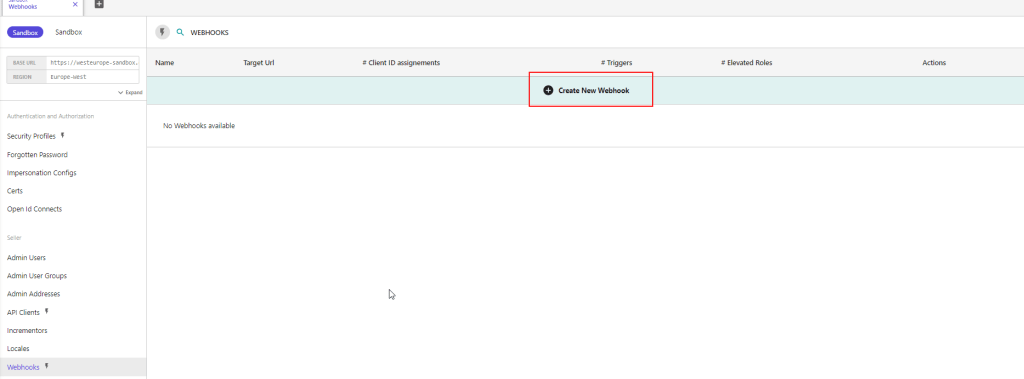
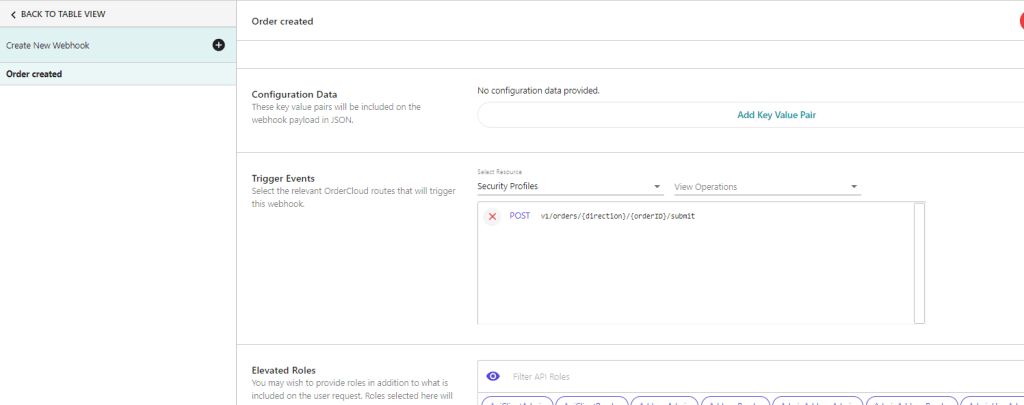
In the new interface setup a name, secret, payload url, etc.
Select the trigger events you want to trigger the webhook. For example when a order is submitted and you want to send data to another system. You can set the order submit as a trigger event. And check the pre-hook if you want it to execute something before OrderCloud.
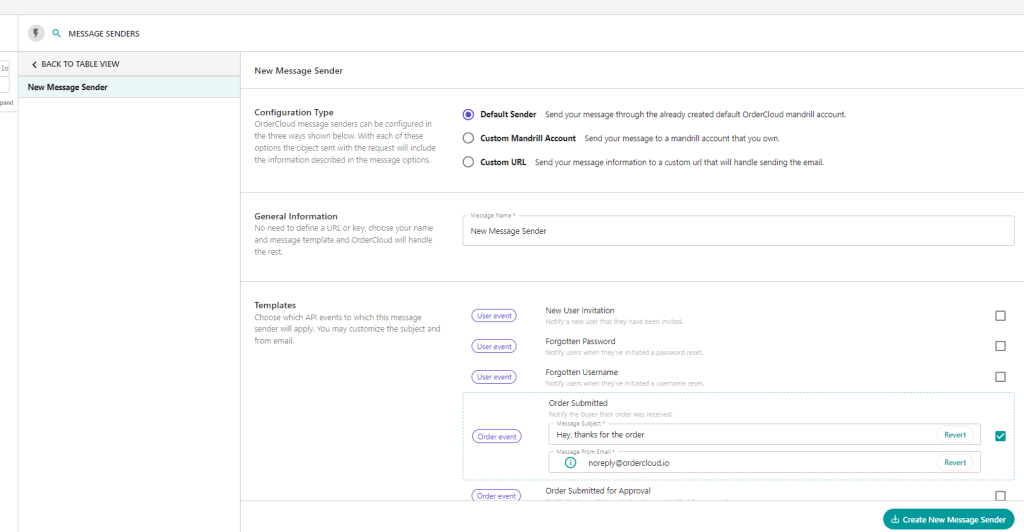
Message Senders
Message Senders are a feature designed to deliver event-driven notifications to users based on activities such as order submission, shipment, password resets, and more.
In comparison with Webhooks, which are also event-driven, Message Senders are more suitable for notification tasks because they automatically retrieve all the relevant information and send a web request for each message that should be sent. This simplifies the process compared to the steps you’d have to take with webhooks, which involve writing code for several more steps.
OrderCloud provides different types of Message Senders, each corresponding to a different commerce activity. Users must be active to receive messages, meaning not only that their personal accounts are active but also that the buyer or supplier organization they belong to is active.
There are three different configuration options for Message Senders: Default Sender, Custom Mandrill Account, and Custom URL. Each option provides a different level of control:
- Default Sender: The easiest, no-code option. Uses OrderCloud’s Mandrill account and templates, providing minimal control over the email templates or the data sent.
- Custom Mandrill Account: A low-code option that allows you to provide your own custom email templates. The actual sending of emails is still handled by OrderCloud.
- Custom URL: The most flexible option that requires more work. You provide OrderCloud with the URL to your publicly available endpoint, which will receive the event payload and is responsible for formatting and sending the notification.
The system also provides a list of variables (Mandrill Variables) that you can use in your custom email templates if you’re using the Mandrill/Mailchimp integration.