Solr Index issue – empty index periodically

If you have a working index and search result and you find that it starts to get empty all of the sudden on what seems to be an interval, Sitecore is probably rebuilding the entire index for you based on a job agent.

There is a default Threshold of 100k that tells Sitecore to trigger an index rebuild after publish:end event if you’re using that type of index strategy and if you’re using <CheckForThreshold>true<CheckForThreshold>.

When an index is being rebuilt, the index is empty during the rebuild. This will cause downtime on your search and is obviously not great user experience.

This is where you should use SwitchOnRebuildIndex (Sitecore docs here). It is a recommended practice to use SwitchOnRebuildIndex when CheckForThreshold is set to true. Go to <site>/sitecore/admin/showconfig.aspx to see what you’re using if you don’t know.
It’s located under

This can become an issue if you for instance have buckets with lots of items to index. So make sure that you switch to SwitchOnRebuildIndex on your index configuration.

Create rebuild core

You need to have a rebuild core for the index you want to use SwitchOnRebuildIndex on.

  1. Stop your Solr Service in Services or Task Manager -> service tab
  2. Go to <Solr_Folder>/solr-8.8.2/server/solr and create a copy of your desired indexfolder and and add _rebuild at the end like this.

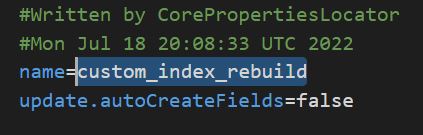
  3. Go into the newly created copy folder and open core.properties file. Here you change the name of the core to match the folder name with _rebuild at the end.

  4. Now create a patch file for your index where you change the type and add the attribute for the new core
<configuration xmlns:patch="http://www.sitecore.net/xmlconfig/">
  <sitecore>
    <contentSearch>
      <configuration type="Sitecore.ContentSearch.ContentSearchConfiguration, Sitecore.ContentSearch">
        <indexes hint="list:AddIndex">
            <index id="custom_index" type="Sitecore.ContentSearch.SolrProvider.SolrSearchIndex, Sitecore.ContentSearch.SolrProvider">
                <patch:attribute name="type">Sitecore.ContentSearch.SolrProvider.SwitchOnRebuildSolrSearchIndex, Sitecore.ContentSearch.SolrProvider</patch:attribute>
                <param desc="core">custom_index</param>
                <param patch:after="*[@desc='core']" desc="rebuildcore">custom_index_rebuild</param>
            </index>
        </indexes>
      </configuration>
    </contentSearch>
  </sitecore>
</configuration>

Done

Start up your Solr service and open Sitecore.
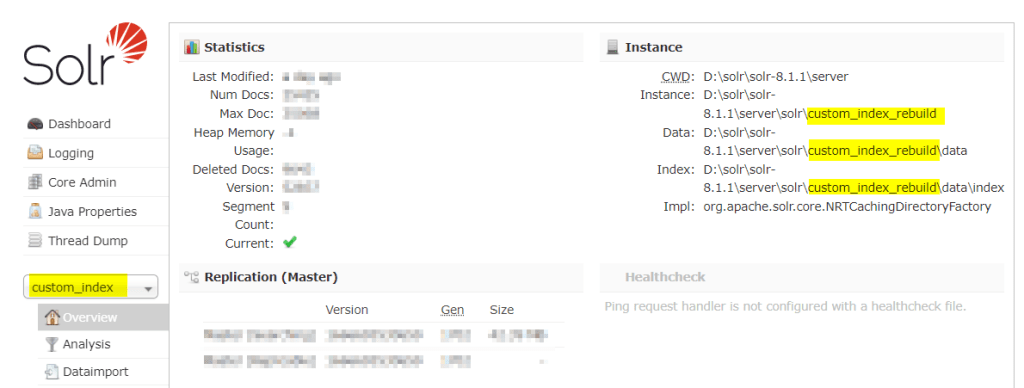
Now your index should switch cores when being rebuilt. The core swap will happen automatically. You can verify this in your Solr instance admin UI and see that your index “custom_index” might now be located in the “custom_index_rebuild” folder. They will switch back and forth automatically and this is expected behavior.

Sitecore Scheduled Tasks – Database Agent

I just want to briefly explain how the database agent work because I’ve noticed a lot of confusion about it and why it behaves like it does.

– “Why aren’t my tasks running!?”
– “Is there something wrong with my interval?”

These are just some of many questions that might pop up as a new developer or if it’s a new feature for you to work on with Sitecore.

What is Scheduled Tasks?

It’s first and foremost a tool in Sitecore where you can run code within an interval.
Sitecore has an internal Database agent that runs on an interval based on your configuration. Default is 10 minutes.

So every 10 minutes Sitecore goes over all it’s schedule task items and checks the interval to see if it’s due to run or not.
Note: After an app pool recycle all tasks will run the first time your database agent runs if it’s a valid schedule that has correct From-date, To-date and days to run. i.e. 20200101|20990101|127|01:00:00.

You can always trigger Schedule tasks manually. For instance you can use Sitecore Powershell Extension to do this.
But for some reason, maybe extending the scheduler with custom code, you want to see how it behaves when run automatically through the database agent.

Master Database Agent

Master_Database_Agent is defined in the Sitecore.Processing.config. The interval can be patched to change the interval if you want in a patchconfig.

<configuration xmlns:patch="http://www.sitecore.net/xmlconfig/">
  <sitecore>
      <scheduling>
          <agent name="Master_Database_Agent" type="Sitecore.Tasks.DatabaseAgent">
              <patch:attribute name="interval">00:05:00</patch:attribute>
          </agent>
      </scheduling>
  </sitecore>
</configuration>

Tasks interval

Did you know that “Schedule” on a schedule item also is a link to an old Sitecore doc page explaining how to setup tasks? Link here

You can press the “Schedule” label to reach the url

This clearly explains how to setup intervals for running on specific days, From-dates, To-dates etc.
Always a helpful tool when working with schedule tasks.

Sitecore custom personalization rule

In this case i’m going to use personalization to check whether a visitor has logged in through our custom login portal or not. Based on this I want to show different datasources for let’s say our Hero banner. Check my previous post how to use rules and select datasources here.

1. Create custom rule

Step 1 – First we create a new Tag under “/sitecore/system/Settings/Rules/Definitions/Tags”

Step 2 – Then go and create a new Element under “/sitecore/system/Settings/Rules/Definitions/Elements/”

Step 3 – Insert new “Condition” under your Element. In my case I don’t want any other conditions than a bool check so i’ll just write the text like below.

  • Text = text displayed in the Edit Rule Box in Experience editor. This support complex conditions like
    "where the http request [ParameterName,,,name] parameter [OperatorId, StringOperator,,compares to] [Value,,,specific value]" Useful blogpost by pushpaganan explains more
  • Type = Your namespace and assembly to your custom code.

Step 4 – Now select the “Default” tag under “Tags” and select your custom tag

Step 5 – Lastly we need to add this tag to a conditional rendering at “/sitecore/system/Settings/Rules/Conditional Renderings/Tags/Default”


2. Create custom rule code

For a simple check in bool I setup following code which checks if the visitor is logged in and returns true or false. You’ll have to set your own code to verify if logged in depending on how your team is doing this.

public class CheckUserLoggedInRule<T> : WhenCondition<T> where T : RuleContext
{
    protected override bool Execute(T ruleContext)
    {
      Assert.ArgumentNotNull(ruleContext, "ruleContext");
      if(<your bool check if logged in>)
        return true;

      return false;
    }
}

3. Add the newly created rule on a component

Finally we can add the personalization rule in Experience Editor on our component. Press the + then add your new rule as a condition. Then select a different datasource and your ready to go.


You can preview what it will look like when switching between the new rule and the default in Experience Editor.