Have you been in SitecoreAI page builder and ever felt like you forgot which environment you were working in? Stage or production for instance.
You don’t want to find yourself working in the wrong environment!
Usually you might keep yourself to one environment so it’s not that much of an issue. But as a developer i’m often in both.
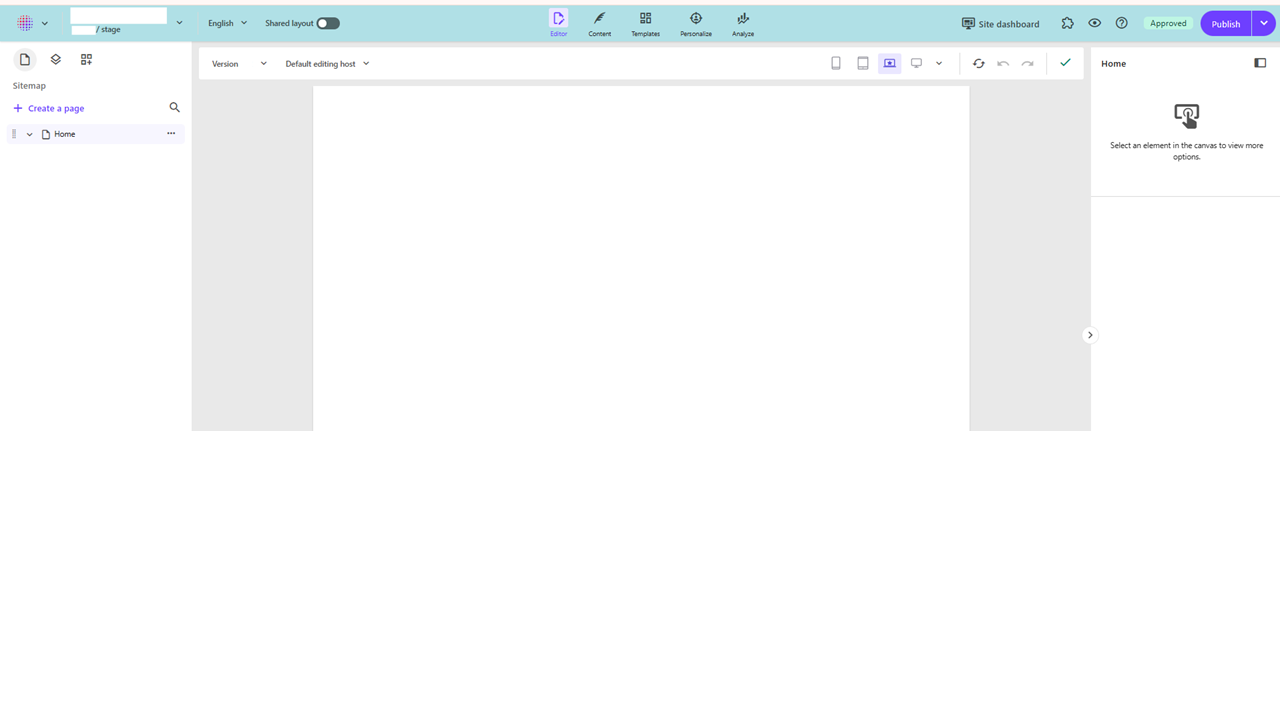
In page builder everything looks exactly the same except a small label where it says “stage” or “production”. Or you can see it within the url. But I wouldn’t say that it stands out very much, especially not for editors.
So I thought, how can I make it stand out more, which environment I’m in?
So for anyone using Chrome I made a Chrome extension thats been published on the Chromewebstore.
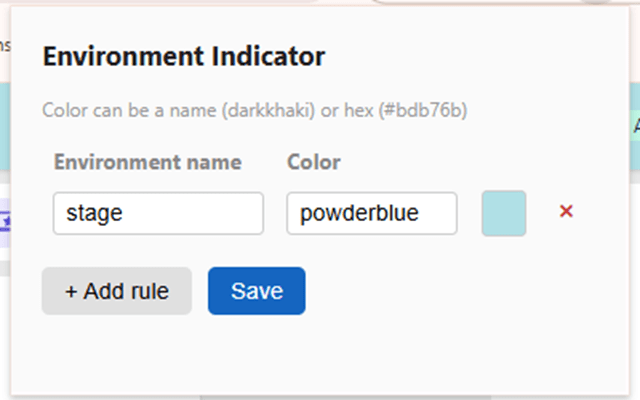
It uses a rule based approach where you can associate which environments you have with a color. If it finds a match within the html, it will append the background color on page load. You can define multiple rules with any environment and colors.
In a previous post I wrote about Sitecore A/B/n test and the more text about it and how it works and why to use it etc. If you’re intrested here’s a link: HERE
In this post I want to give you some clear examples on how to setup a A/B/n test in Page builder in SitecoreAI.
1. Create your hypothesis
You should define a clear hypothesis and goal before starting an A/B test. The hypothesis should describe what change you are making, what outcome you expect, and how success will be measured. Even small changes, such as a new headline or a different button position, can be tested if they are tied to a measurable goal.
For example:
“By using a more engaging headline, we expect to increase engagement on the product page.”
2. Create the A/B/n test in Page builder
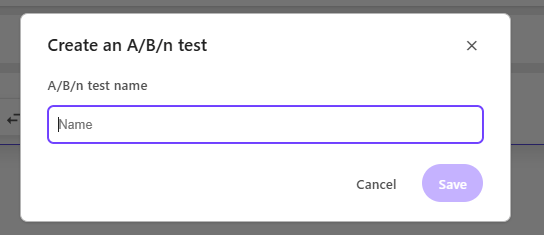
Select the component you want to test and press the “vial” icon. (Look at bottom of the post for troubleshooting if your missing the Vial icon)
You will be prompted to set a name for the test:
3. Configure your variants
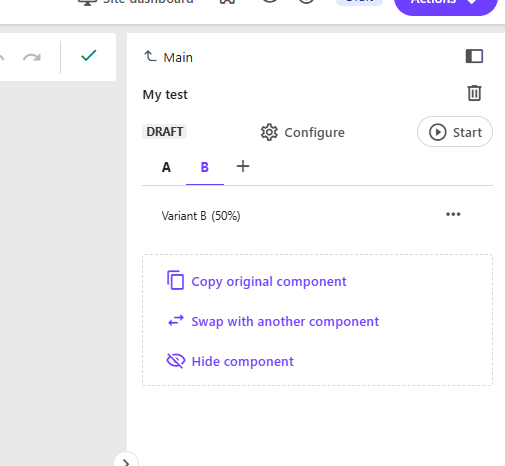
In the right pane window you will now see the window for your created A/B test. In here you can create more variants if you want to. Up to a maximum of 6 variants.
Either you “Copy the original component”. Meaning you take in what’s in the original control (Variant A) and to get started quickly, with maybe editing a text or other design elements you can change on your component.
Or you can “Swap with another component”, if you’re hypothesis is that another component will increase page views etc.
Finally you can just “Hide component” if you believe you get more engagement without that component on the page.
Remember that A/B/n testing is about testing your hypothesis. Even though it might be “We don’t know which of 3 variants will generate most engagement”. You can still test it.
Configure the test
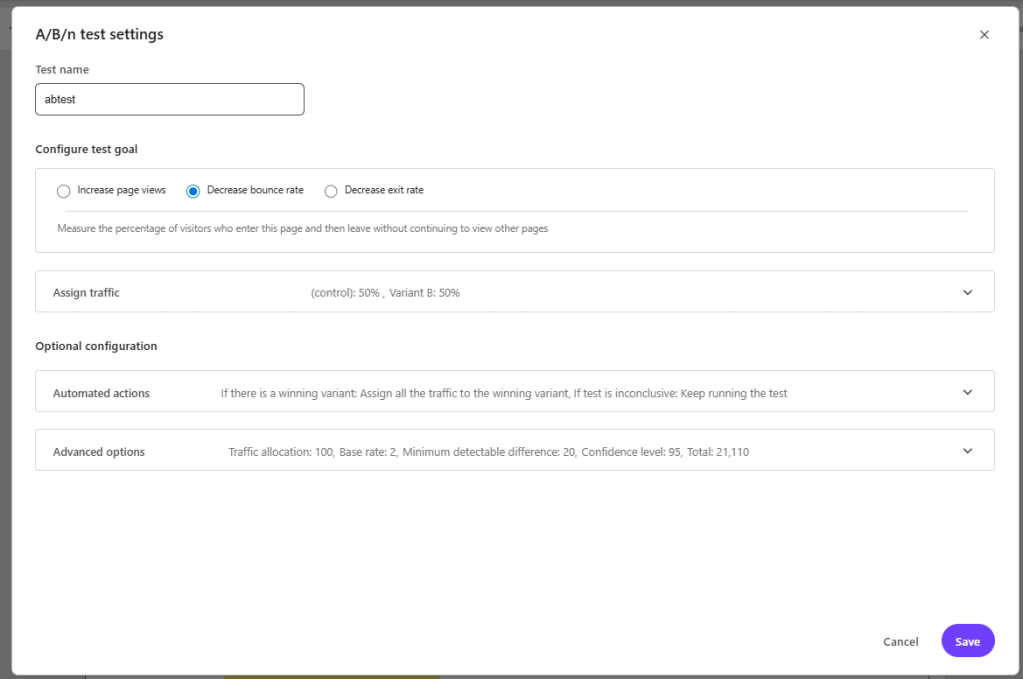
There are 4 configurations we can make in the test. By pressing “configure” we get this pop-up.
1. First you Configure the test goal – By selecting what you want to measure. Increase page views, Decrease bounce rate or Decrease exit rate. If you select Increase page views you must choose a page to measure.
2. Assign traffic – Here you can choose how many % of visitors you want to get to each variant. If you want 50/50 there is a button to help with that.
3. Automated actions (optional) – here you can setup what happens “If there is a winning variant” and “If test is inconclusive“. It could be that it automatically sets the winning variant as the new main and sends all traffic to that. Or you could choose not to. Same if the test is inconclusive, you could set that it should keep running the test or end it and send all traffic back to the control.
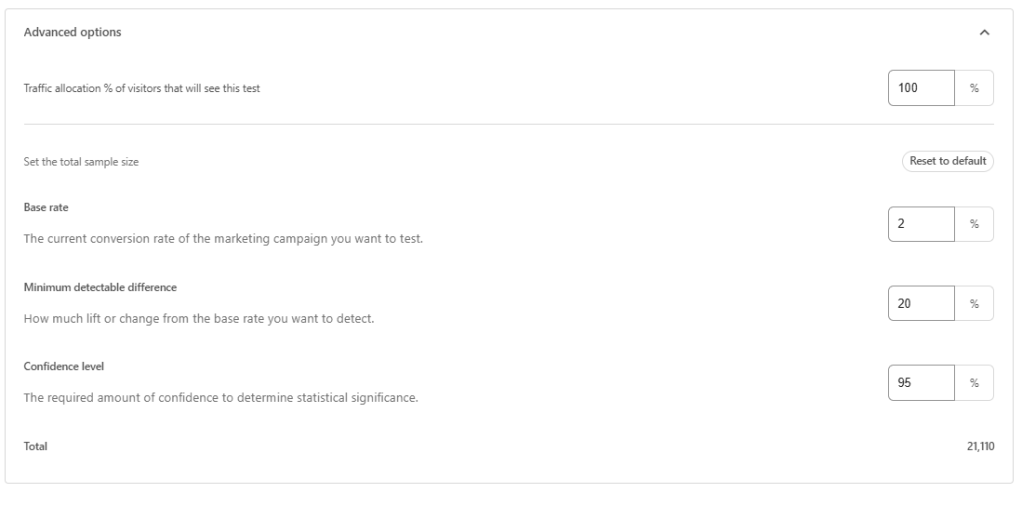
4. Advanced options (optional) – Here you can set more granular control over the test like
– Traffic allocation (how many visitors will be exposed to the test itself). For example, setting this to 20% means only 20 out of every 100 visitors will participate in the test. – Base rate. Increasing the base rate decreases the required minimum sample size. – Minimum detectable difference. Increasing this value decreases the required minimum sample size, but also makes the test less sensitive – Confidence level. This is the level of certainty required to confirm that differences between variants are statistically significant. A 95% confidence level is the accepted standard, meaning you can be 95% confident the results are accurate and not due to luck.
The default is a pretty good overall setup and only if you’re confident you could mixture with these settings. Always run a test for the total sample size (Total in the bottom) for a valid test.
Troubleshooting note: If you can see the vial icon but can’t press it you probably have personalization setup on the page (I talked about that in my previous post, they can’t coexist on the same page). If you can’t see the Icon at all you’re probably on the wrong JSS versions or missing packages in metadata. You need to be on at least JSS version 22.1.0 and it needs to have metadata with all installed modules that start with @sitecore. You can get this information by requesting this endpoint: api/editing/config.
Go to Dev tools in your browser, go to network, filter on “api/editing/config”. In the response you should see the json with packages that start with “@sitecore”. If you’re missing any required package Sitecore won’t show the icon.
Atleast need sitecore-jss and sitecore-jss-nextjs (or react if your on that). Unsure if you specifically need others to make it appear.
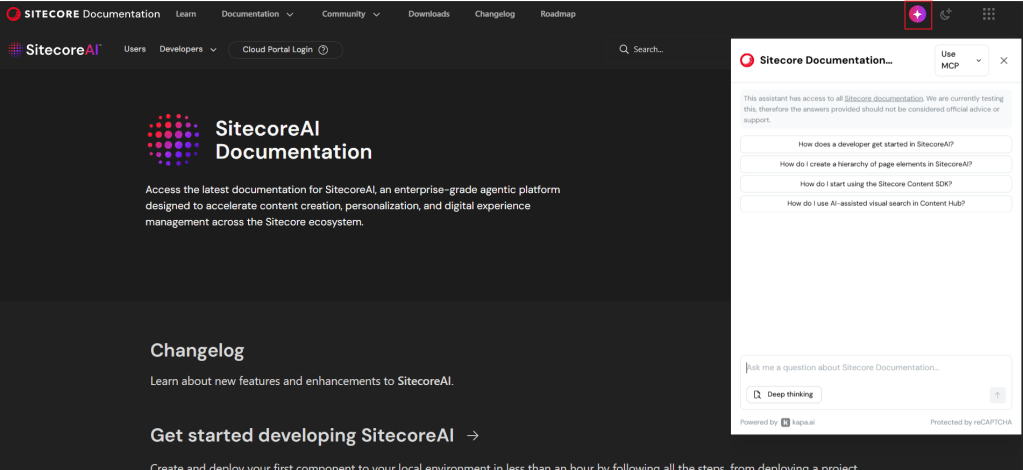
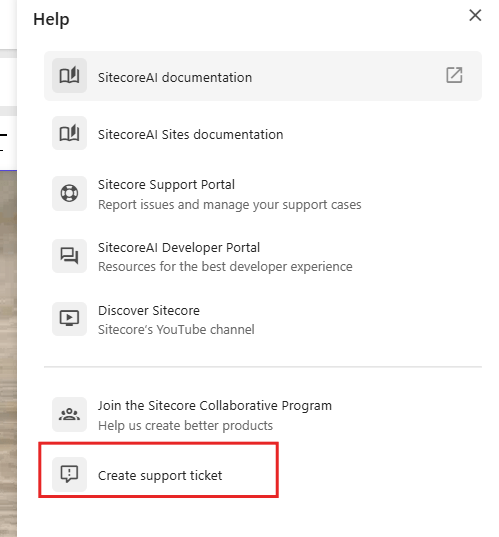
Did you know Sitecore Docs has a new AI feature that you can talk with a LLM chat that has been trained on the Sitecore documentation?
Just go to https://doc.sitecore.com/ and press the Icon in the header, marked in the picture, and you can start asking it questions.
Sitecores documentation has greatly improved the last years, not only in quality, but also in quantity. Sometimes it can be hard to find the right place to look at. And with this AI chat tool you can find answers fast!
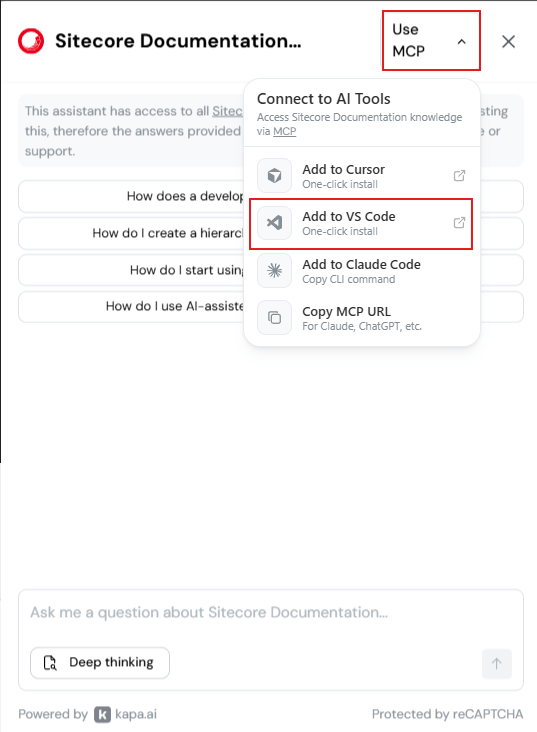
There is also an MCP server you can connect to. To add the MCP to your VS Code you can do following, or Cursor etc:
You can now also use the MCP in context with your code repository to get even more context for your question.
A short post but it gives huge impact, and fast!
NOTE from Sitecore: “This assistant has access to all Sitecore documentation. We are currently testing this, therefore the answers provided should not be considered official advice or support.”
Translate a page or even translate an entire site from one language to another is a powerful yet simple to use tool in SitecoreAI.
Lets break it down.
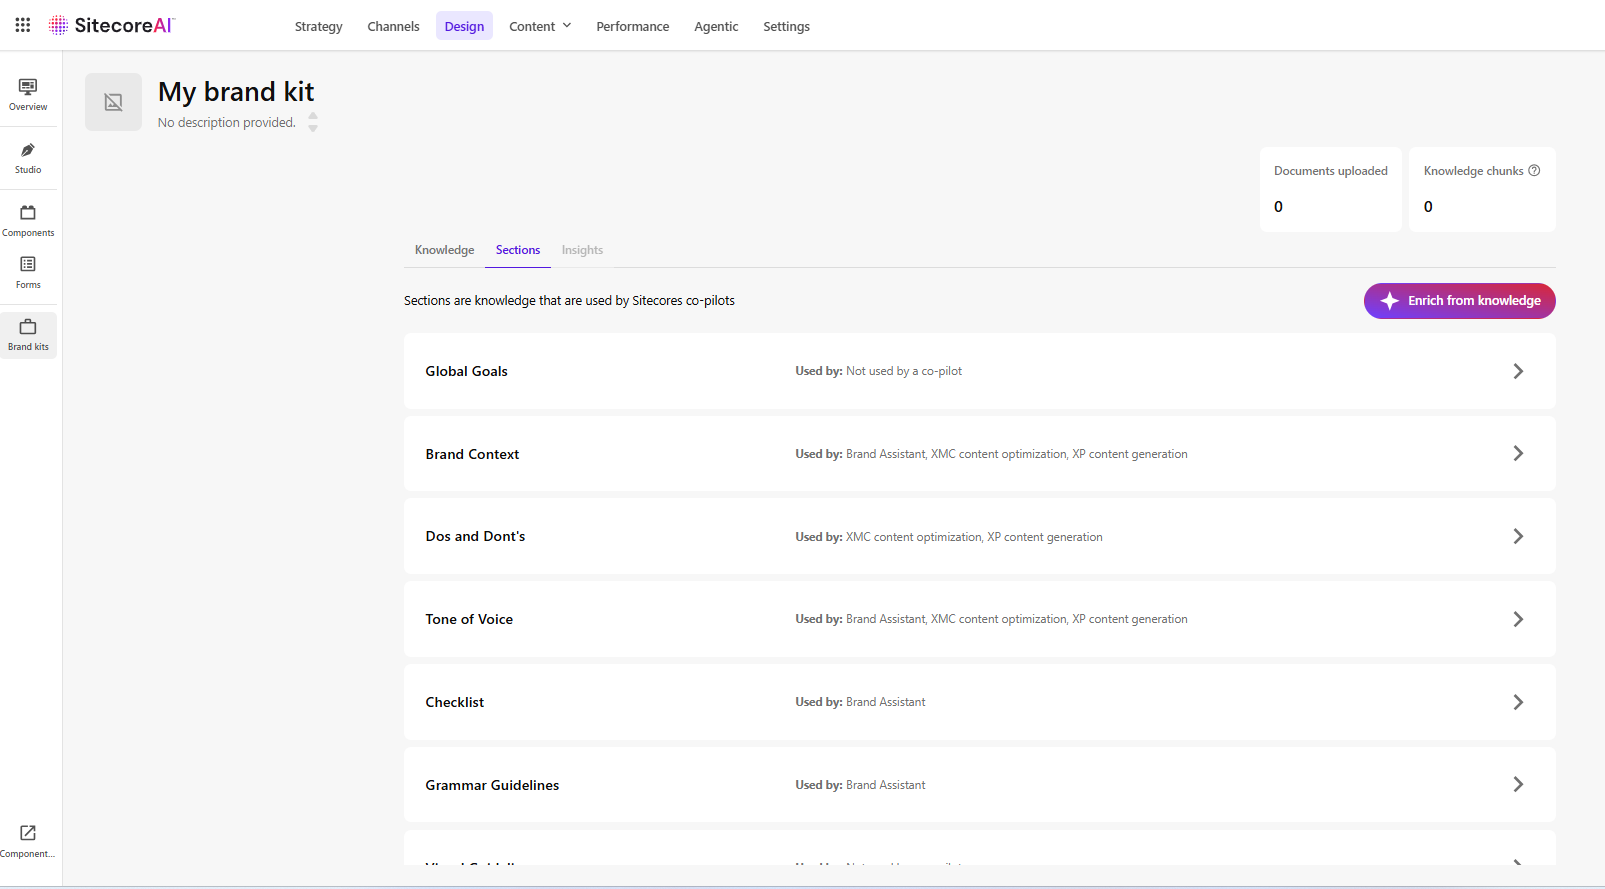
First lets talk about Brand Kits
Brand Kits allow marketing or communication teams to configure how AI should generate content within Sitecore.
By creating Brand Kits, organizations can define instructions and brand guidelines that AI features in SitecoreAI will follow. When editors then use AI functionality they can select a Brand Kit. Brand kits provide:
A centralized location for brand instructions
Reusable configuration
Consistent tone and messaging in your content
By default, administrators can see all brand kits, but they have the power to grant users access as needed to specific brand kits. This is very important and good feature!
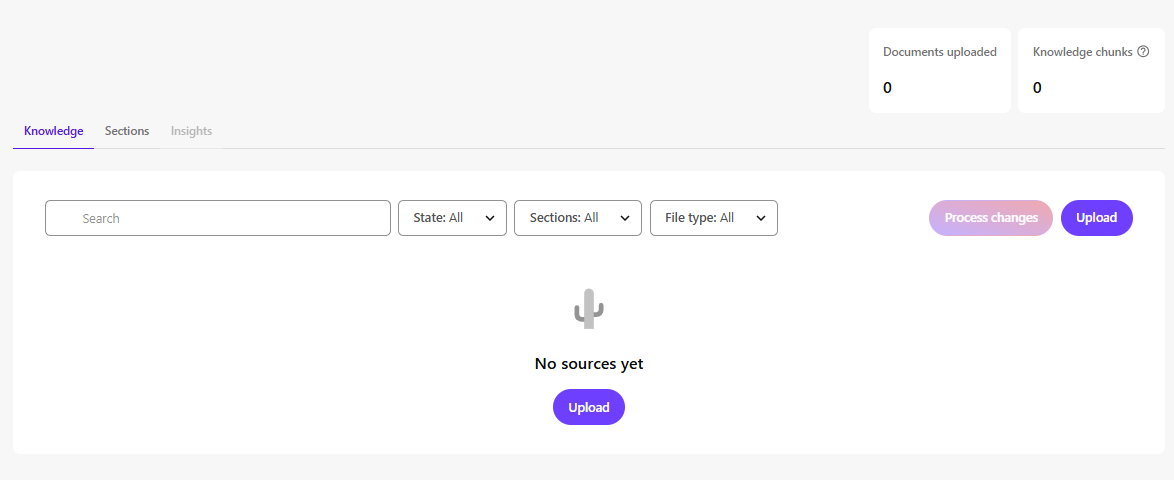
Knowledge
Within a Brand Kit, the Knowledge tab allows you to upload documents that help build your brand knowledge base. Basically if you upload documents here SitecoreAI will populate the otherwise empty sections on the Brand Kit based on those documents.
Examples of supported documents:
Brand books
Visual guidelines
Style guides
Graphic manuals
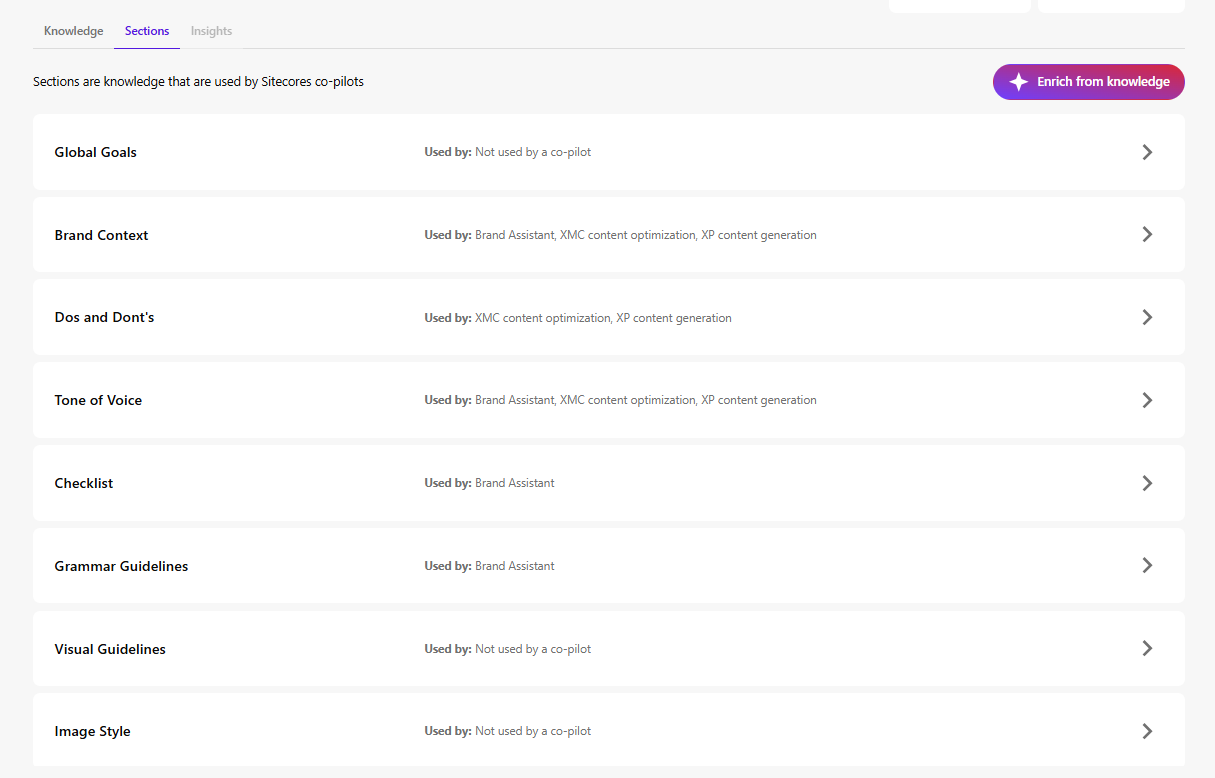
Sections
In the tab Sections, you can setup the configuration of the kit.
Sections can be populated using the uploaded Knowledge documents (via the button in the top-right corner). However, you might want to look over and edit these if needed. It provides a strong starting point, but manual refinement is typically required.
Examples of sections include:
Brand Context – Describes your brand’s purpose and positioning
Do’s and Don’ts – Guidelines ensuring AI-generated content aligns with tone and values (e.g., formal, academic, relaxed)
Tone of Voice – Attributes such as friendliness or confidence that define brand personality
You can setup multiple Brand Kits and use them for different goals, like campaigns, audience etc.
Brand Kits are not required to use translation features, but they can significantly improve consistency and quality.
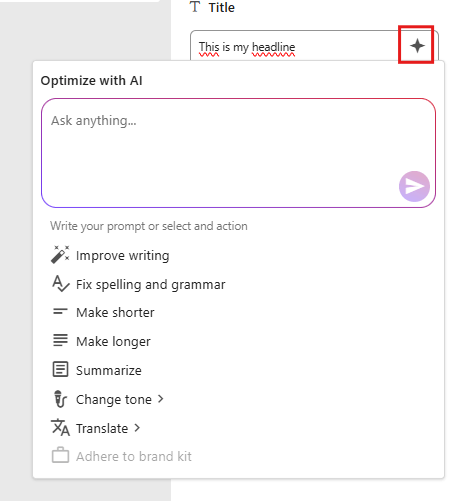
Inside Page Builder, several built-in AI tools support Brand Kits. Like this image below, you can select a field you want to edit, click the “Optimize with AI”-button in red. Here you can use the prompt, translate, or adhere to a brand kit.
Agentic Studio – Translation assistant
The Agentic Studio is a centralized place for AI agents, which helps to automize work for you. There’s a ton of out-of-the-box agents from Sitecore, and one of them is the Translator, which allows you to translate content to multiple languages at the same time while keeping the Brand context.
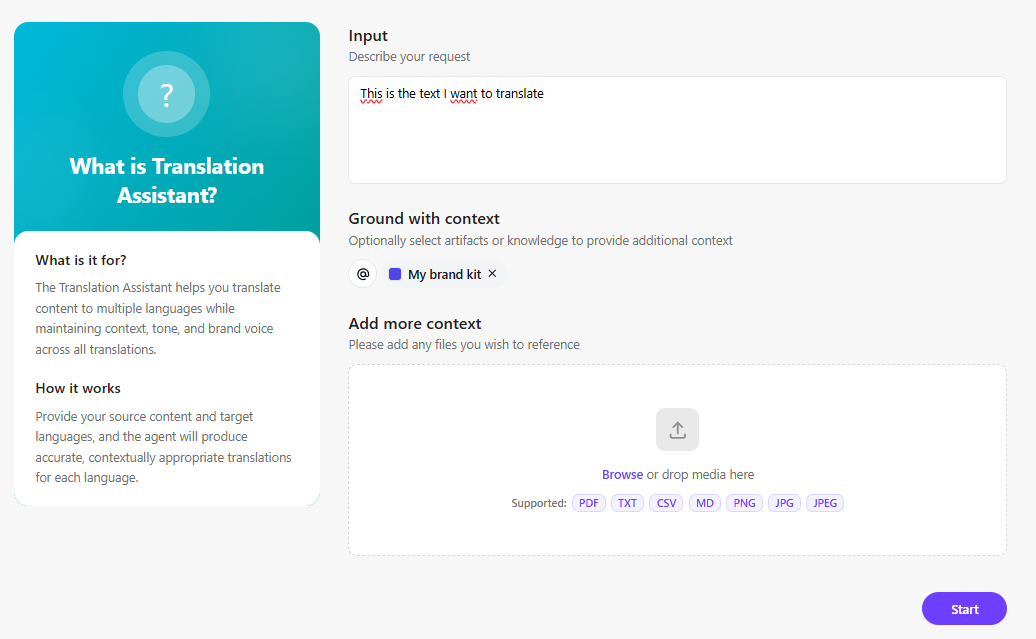
This is the first interface of the Translation Assistant. You have your input, then you can add context; in this case, I’ve added my Brand Kit as context to get the tone of voice, etc., that I’m interested in. You could also add more context to the translation if you wish.
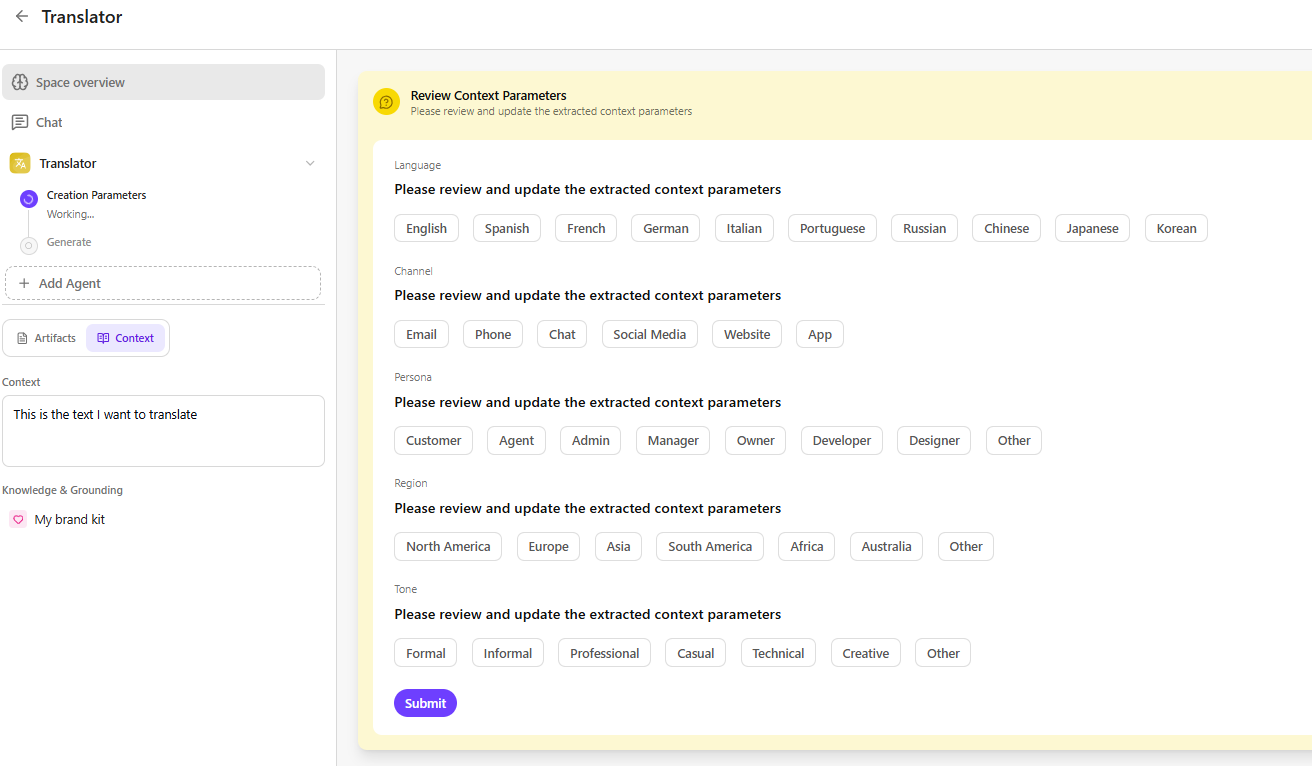
Then we get this window. Here we can set the desired parameters for this translation job. Like selecting which languages, persona, tone etc. Then the artifacts are created for each translation for you to use.
Page translation
This is maybe the highlight of this blogpost. This functionality does not require Brand Kits.
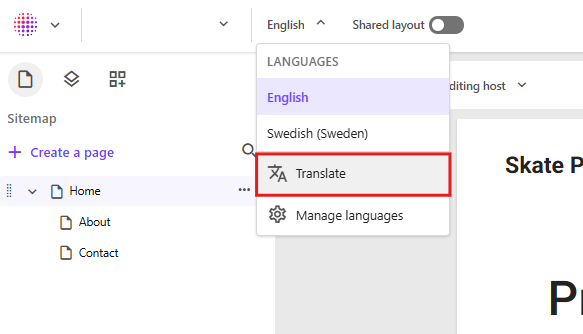
For example, you can navigate to a page that has been created and setup content in English. In the language dropdown at the top of Page Builder, select Translate.
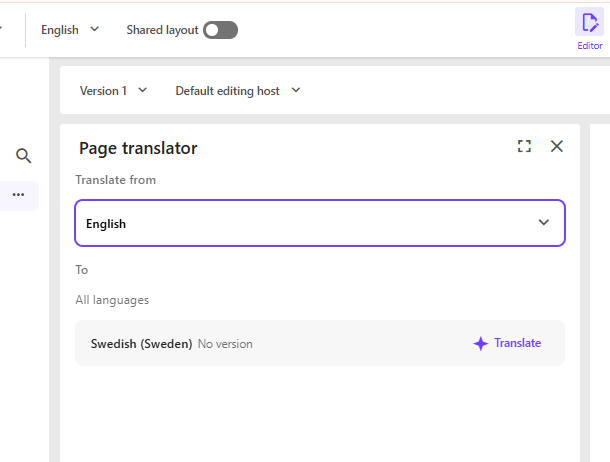
A dialog will appear allowing you to choose one of the available site languages. The system will then traverse all references and related items in Sitecore for that page and generate, for example, a Swedish version. All text content will be translated, display names on items will receive a Swedish version, and image alt texts will also be translated if an alt text exists.
The following field types are translated:
Single-line text
Multi-line text
Rich text
General Link (link title, link text)
General Link with Search (link title, link text)
Image (alt text)
Shared fields are skipped. These are template fields marked as SHARED, since they are identical across all language versions.
Choose source language and then click Translate on the desired language. Note that your language only pops up here if it’s configurated for the site.
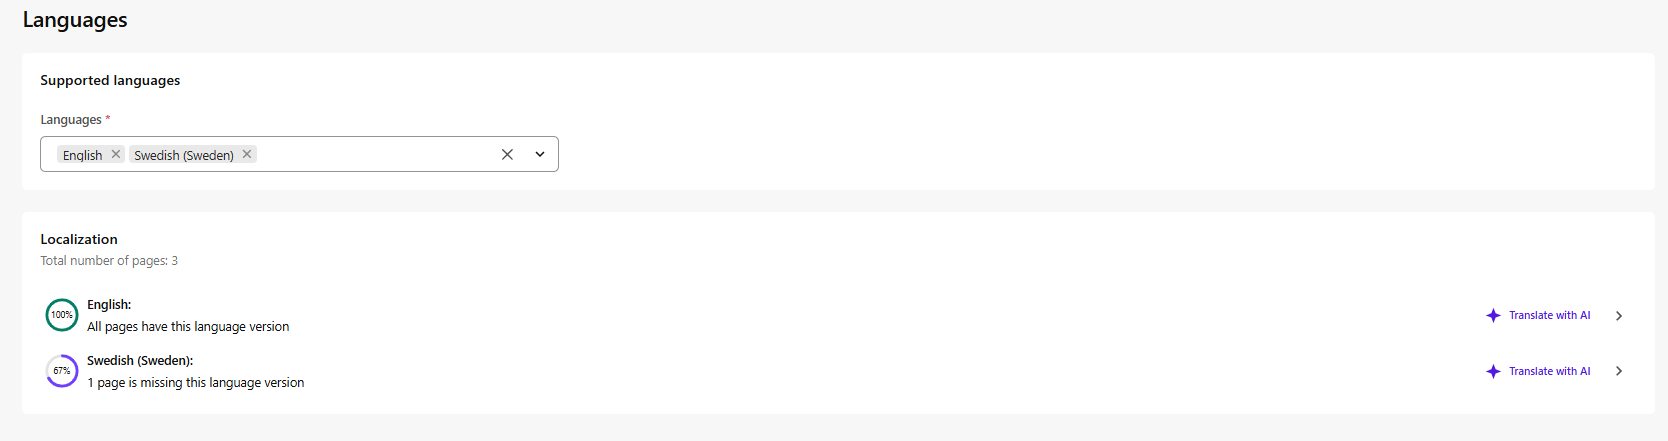
Site translation
If you instead go to manage languages from page builder you will get to this language page, here you have the button “Translate with AI” which does the same as the page translation but for the entire site. Very powerfull stuff!
The full site translation functionality is available for admins or Sitecore Client Site Managing roles.
That’s what I wanted to go over with Sitecore AI translation and some info on the Brand kits also if you’re interested in that. Hope this helps!
A/B/n testing is a powerful tool used to understand which content engages your visitors the most. I’ll explain the concepts, share insights on how to get started, and what to consider when working with SitecoreAI’s A/B/n testing.
What is A/B/n testing and why is it important?
A/B/n testing is about comparing different versions of a webpage or a content element to see which version performs best. By formulating a clear hypothesis, for example, that a new color or text of a CTA button will increase page views by 10%, you can make data-driven decisions that improve user experience and conversion rates.
What is the difference between A/B testing and A/B/n testing?
The main difference between A/B testing and A/B/n testing is the number of versions, so-called variants, being tested.
A/B testing compares two variants, while A/B/n testing evaluates multiple variants simultaneously. An A/B test is a simple comparison between two options and tests a specific change to determine which performs better. An A/B/n test evaluates several design options, layouts, or headlines at the same time and provides a faster overview of which of many ideas works best.
What distinguishes SitecoreAI from traditional A/B testing tools?
SitecoreAI differs from traditional A/B testing tools in that it is tightly integrated with the entire Sitecore ecosystem and can use artificial intelligence to optimize tests. This includes:
Faster insights: SitecoreAI helps analyze results in real time and can identify winning variants faster than manual testing. With SitecoreAI, you can compare up to six variants.
Automation: You can configure rules to automatically direct all traffic to winning variants once results are statistically significant, reducing manual work.
Integration with Sitecore: Because the testing tool is built into the platform, you can easily connect A/B/n testing to other Sitecore features, such as forms and content management, without needing external tools.
Effective default goals: SitecoreAI comes with predefined goals (e.g., page views, form submissions, bounce rate) that make it easy for marketers to get started quickly without advanced statistical knowledge.
In short, SitecoreAI makes it possible to combine A/B/n testing with AI-driven insights in a way that is difficult to achieve with standalone testing tools. It saves time, delivers more accurate results, and simplifies optimization of the entire website.
How A/B/n testing works in SitecoreAI
First, you develop a hypothesis for your test. For example, reducing the number of fields in a form may increase form submissions by 10% compared to the current version.
Based on your hypothesis, you define the test goals. SitecoreAI includes predefined standard goals:
Increase page views
Increase form submissions
Reduce bounce rate
Reduce exit rate
You then create a control variant (Variant A) and a test variant (Variant B) and split traffic between them, either 50/50 or using another distribution you decide. As mentioned, you can create up to six variants.
You determine how long the test should run, but Sitecore recommends running it for at least one week to ensure statistically significant results.
SitecoreAI then provides insights into which variant performed best, or whether there is no difference (a null result). You can configure the system so that the winning variant automatically receives all traffic, or if results are inconclusive, that the test is extended or traffic is reverted to the original variant.
What you can test
Anything you can change on a page or in a form can be tested. Examples include:
Content: Images, CTA copy, headlines, and components
Sitecore forms: Number of fields, button placement
Design and layout
Tips for effective testing
Change as few variables as possible at a time. This makes results clearer and easier to interpret.
Prioritize areas of the page with the greatest impact, such as hero banners or purchase buttons.
Run tests regularly to account for changes in visitor behavior over time.
Set a confidence score (e.g., 95%) to determine when a winning variant should receive all traffic.
Note that A/B/n testing does not work simultaneously with personalization. Because personalization shows different content to different users, it can conflict with the purpose of the test. If you want to run an A/B/n test on a personalized page, the solution is to temporarily pause personalization while the test is running.
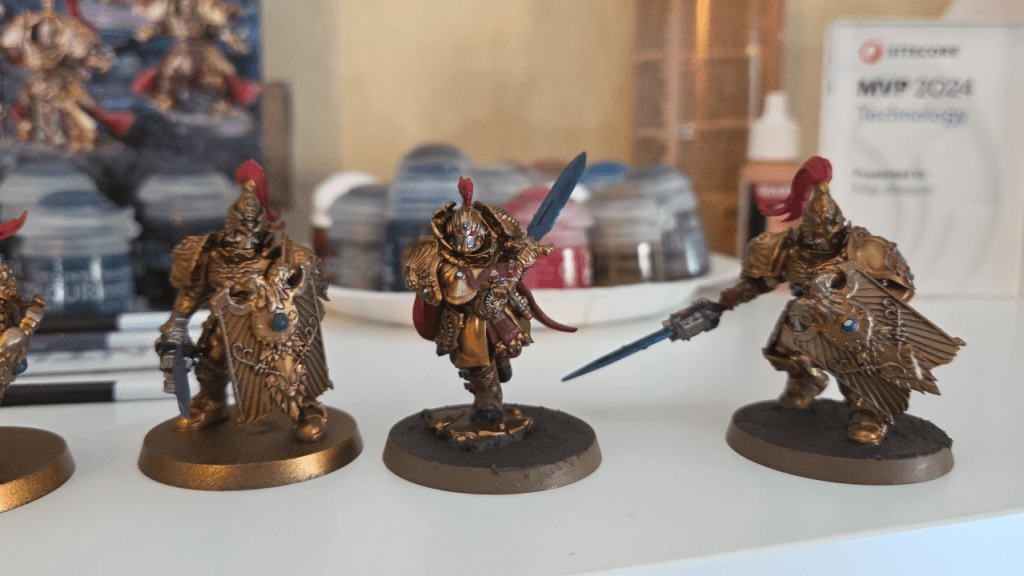
I know I did, and after 15 years, I even picked up and old hobby of mine: Warhammer 40k
I spent months researching which faction to start with. Read up on their strengths, what would be most fun to paint etc. It required a lot of thought, because I wanted to invest in the right army for me and what I thought was important.
At some point I thought, just for fun: “I wonder if there are any similarities between this and Sitecore AI?”
So here’s the comparison.
1. Choosing a faction – Choosing a system
Before investing in a faction or a system you evaluate its strengths and weaknesses. The complexity, flexibility, long-term viability, limitations etc.
Is this the right choice for what I find important? These are things we look for when choosing our technical platforms. This is also why platforms like Sitecore work so well: they reward teams who know what they want to achieve.
2. Design and paint -> Web design and experience
Painting is a huge part of Warhammer, just like design and user experience, both for editors working in the system and the final experience where visitors interact.
For instance, a well executed design doesn’t necessarily mean it fits its purpose.
You can paint something amazing, but still in a way that clashes with the established theme or identity of the faction. The same applies to web design: just because something looks good doesn’t mean it serves its intended purpose. Design without intent is decoration.
3. Assembling the models -> Building the solution
Assembly mistakes are hard to undo, on both sides. Poor structure has implications further down the line.
It takes time to build something good and long lasting, and shouldn’t be rushed. Yes, implementations move faster today with all available tools and AI, but they don’t eliminate the need for a solid foundation. Speed should not come at the cost of structure.
4. Strategy in use – Strategy in reality
Strategy sets direction. It’s how you use your army/platform that matters most.
With SitecoreAI there are endless possibilities, therefore a good strategy is key. As a Warhammer beginner, I lean on experienced players. With Sitecore, you can do the same by working with experienced partners. And in today’s landscape, adaptation is just as important as having a plan.
Warhammer reminds me that good outcomes are rarely accidental.
If you don’t already follow the changelog, make sure to track the RSS feed. Since SitecoreAI is constantly getting updates and improvements to Page Builder, SDKs, etc., you really should follow the changelog so you can easily see when new features are released, start using them, and inform your editors. https://developers.sitecore.com/changelog
I thought I’d sum up some of my favorite features and improvements released the last couple of weeks. Not in any particular order
This is Sitecore’s design system to ensure a consistent look throughout SitecoreAI. I’ve used the Beta when trying new marketplace apps created with the new Marketplace SDK that came earlier this year. It makes it really easy and the design matches rest of SitecoreAI which makes it look professionally integrated quickly and easy. With this realese it’s now ready for production.
This brings clarity for editors working in Page Builder. I was working on a marketplace App to give editors more tools in Page Builder, and this was one of the features I had in mind. It’s great that it’s now incorporated in by Sitecore as a default feature. We want our editors to be able to works as much as possible in Page Builder without having to switch to Content Editor unless needed. This is a step in the right direction.
Create support tickets directly from Page Builder, insert link now respects cross-site linking is disabled, but most important maybe is that items deleted in Page Builder now ends up in the recycle bin as expected instead of being instantly deleted.
A nice touch for clarity is that it now says Unpublish if you set a publish restriction on a page, and it removes the page from Edge when triggered.
Marketplace apps can now be made public. When you’ve created an excellent app, you can submit it to Sitecore for review, and if it meets the standards, it can be published for all SitecoreAI to discover and use in the Marketplace. You can choose a free, freemium, or paid tier for your app.
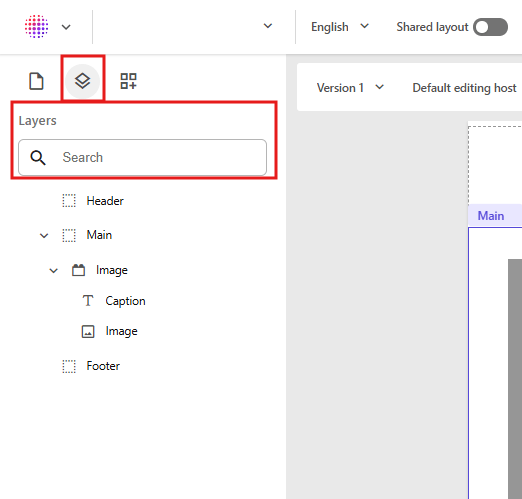
In a previous release we got the Layers tab in Page Builder in the left-hand pane. This makes it easier to see all components on your page in the correct order. You can also click a component in the tree to instantly focus that component or field in your editing window.
If you have lots and lots of components on your page, you can now search for specific names to filter out the otherwise long list.
Summary
These are just a handful of updates that have come to SitecoreAI. There are tons more like Sitecore Agentic Studio, Sitecore Marketer MCP and many more. Make sure to follow the changelog, because SitecoreAI is evolving fast and you don’t want to miss out on new features and improvements!
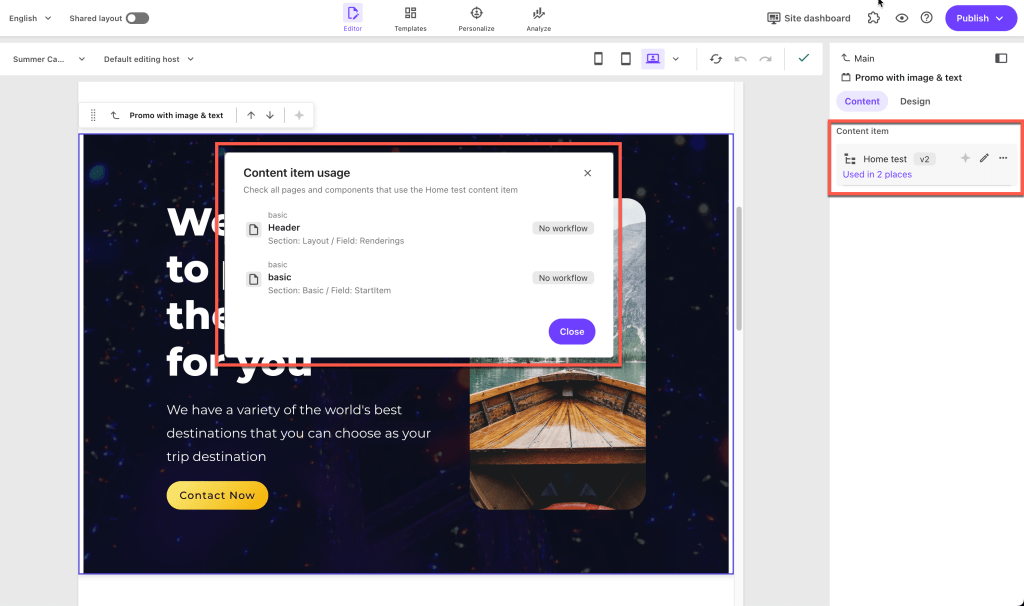
In Sitecore, a workflow defines the series of steps content must go through before it can be published. It ensures that all content is reviewed and approved before becoming visible to website visitors. A typical workflow includes stages like Draft, In Review, and Approved to keep track of progress and prevent accidental publishing of unfinished content.
Most workflows in Sitecore are applied to pages and components. However, a datasource workflow is a little different. It applies to content stored separately in folders, not full pages. A datasource workflow ensures that this reusable content is properly reviewed and approved before being displayed in multiple places on the website.
Why Use a Datasource Workflow?
Using workflows for datasource items provides several advantages:
Control: Ensures that datasource items follow the same review process as full pages.
Reusability: Since datasource items are often reused across multiple pages, workflows prevent unapproved changes from affecting multiple locations.
Collaboration: Allows multiple content editors to contribute while maintaining oversight.
Versioning and Rollback: Keeps track of changes and allows reverting to previous versions if needed.
How to Implement a Datasource Workflow in Sitecore
Let’s look at a scenario where you have both a Page Workflow and a Datasource Workflow. In this setup, approving a page also automatically approves all datasource items associated with that page.
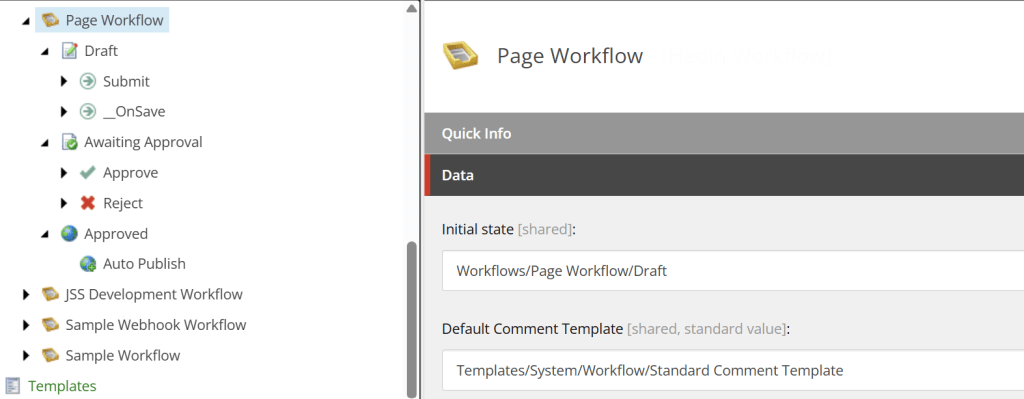
1. Create your Page Workflow. Setup the workflow and the states. Draft, Awaiting approval, Approved for instance. Add the necessary commands, such as Submit under the Draft state.
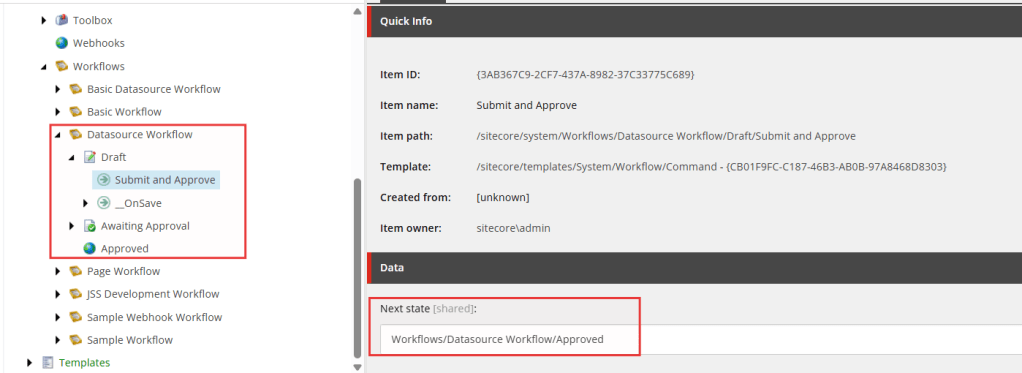
2. Create your Datasource workflow.
In your datasource workflow, create a command in the Draft state called Submit and Approve, and set the Next state to Approved.
This setup allows datasource items to be automatically approved when the page they’re linked to is approved.
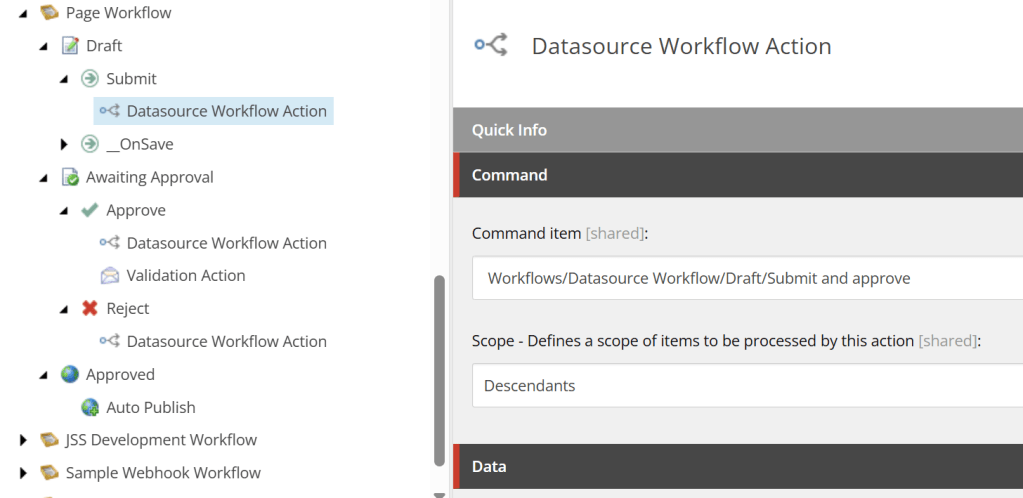
3. Add Datasource Workflow Actions
Add a Datasource Workflow Action and point it to the command you created in Step 2 (Submit and Approve).
Here’s how the flow works:
The page (in Draft) is submitted.
The Datasource Workflow Action triggers the Submit and Approve command on all linked datasource items.
Because this command moves datasource items to Approved, they are automatically published along with the page.
If you prefer manual approval for datasources, you can instead move them to an Awaiting Approval state rather than approving automatically.
Now you can test and verify your workflows in Pages. Workflows are very flexible, you can change these actions to match your specific needs. Try it out and get familiar with it.
In Sitecore XM Cloud you organize media assets per site in the Media Library. You do that in your Media item under the Headless Site. SXA provides helpful tokens like $siteMedia, but they resolve to virtual media folders under the content tree, which breaks when you want to append subfolders (e.g. $siteMedia/Documents/*).
I recently needed to solve this problem in a multisite solution: allow editors to select media items (like PDFs) from a per-site folder in the Media Library using a field source like:
query:$siteMediaRoot/Documents/*
The Problem
Using query:$siteMedia/Documents/* in a field source results in Sitecore falling back to the entire Media Library, or showing no items. That’s because $siteMedia resolves to a virtual folder, and appending paths like /Documents doesn’t work.
I needed a token that:
Resolves to the actual media library root for the current SXA site (not the virtual one)
Supports appending subfolders like /Documents
Works across multiple sites with a shared component
Custom $siteMediaRoot Token
I created a custom SXA token called $siteMediaRoot by adding a processor to the resolveTokens pipeline. This token resolves to the real media folder path (e.g. /sitecore/media library/SiteA) so I can safely use subfolders. This code requires that there is a folder under Media library that has the same name as the Site. Then you just reference that to the Media item under your site.
Token Processor Code
public class ResolveSiteMediaRootToken : ResolveTokensProcessor
{
    private const string Token = "$siteMediaRoot";
    private readonly IMultisiteContext _multisiteContext;

    public ResolveMediaSiteRootToken() : this(ServiceLocator.ServiceProvider.GetService<IMultisiteContext>()) {}

    public ResolveSiteMediaRootToken(IMultisiteContext multisiteContext)
    {
        _multisiteContext = multisiteContext;
    }

    public override void Process(ResolveTokensArgs args)
    {
        if (!args.Query.Contains(Token)) return;

        var mediaRootItem = GetSiteMediaRoot(args.ContextItem);
        if (mediaRootItem == null) return;

        args.Query = ReplaceTokenWithItemPath(args.Query, Token, () => mediaRootItem, args.EscapeSpaces);
    }

    private Item GetSiteMediaRoot(Item contextItem)
    {
        var virtualRoot = _multisiteContext.GetSiteMediaItem(contextItem);
        if (virtualRoot == null) return null;

        var siteItem = _multisiteContext.GetSiteItem(contextItem);
        var siteName = siteItem?.Name;
        if (string.IsNullOrEmpty(siteName)) return virtualRoot;

        var matched = virtualRoot.GetVirtualChildren()
            .FirstOrDefault(c => c.Name.Equals(siteName, StringComparison.OrdinalIgnoreCase));

        return matched ?? virtualRoot;
    }
}
Sitecore 10.4.1 is out. At first it looks like a small update, but there are several things that can impact your setup as a developer. Especially if you’re working with containers, Solr, Identity Server or Azure monitoring. Here’s a quick overview of the most important changes and a few thoughts from my own point of view.
Solr 9.8.1 is now required
This update switches to Solr 9.8.1. The older 8.11.2 version is no longer supported, so you will need to upgrade. With the new Solr version you get a big leap in Security and performance fixes from the older version. I would say that’s the most important parts. Just modernising your Solr foundation.
If you’re using Sitecore containers, you also need to use the new container deployment package that matches the new Solr version. The older container images will stop getting OS patches, so best to move forward.
Identity Server now uses .NET 8
The Identity Server in Sitecore is now version 8.0.16 and built on .NET 8. That’s a good step forward, but it does come with two changes you need to handle:
Encrypted SQL connections are required now.
You have to run a database upgrade script.
So if you’re automating your deployments or have custom Identity Server config, be ready to update both connection strings and database setup.
Azure Application Insights changes
If you’re using Application Insights for monitoring, the old Instrumentation Key is no longer supported. You have to use a connection string instead. This is a Microsoft change and Sitecore follows it now. There are updated ARM templates included if you use Azure to set it up.
Sitecore 10.4.1 brings some important backend changes. For most environments, it’s worth upgrading to keep things supported and future proof, just make sure to test and read the updated install instructions carefully.