Sitecore ContentSearch – Solr using Facets

Search header, magnifying glas

Facets are used with the ContentSearch API to enable filtering and grouping of search results based on specific fields or properties. Facets help users to narrow down search results based on their preferences or criteria. Here’s a guide on how to use facets with ContentSearch in Sitecore

Define the facet field in your search index configuration:

First, ensure that the field you want to use as a facet is included in your search index configuration. For example, if you want to use the “Manufacturer” field as a facet, you should have it defined in your search index configuration.

Create a model class for your search result items:

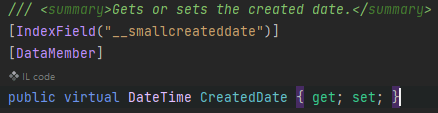
Create a model class that inherits from SearchResultItem and includes the properties you want to use as facets. I would recommend putting the IndexField name in a constant file to reuse everywhere in your solution. Because if it’s every changed you only need to change on 1 place and it won’t break the code. For example:

public class CustomSearchResultItem : SearchResultItem
{
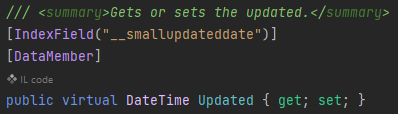
[IndexField("manufacturer")] //Or use a constant in your foundation project
public string Manufacturer{ get; set; }
}

Perform a faceted search:

To perform a faceted search, use the .FacetOn() method in your search query. This method tells the search provider to calculate the count of items for each unique value in the specified field.

Here’s an example of performing a faceted search on the “manufacturer” field:

using (var context = ContentSearchManager.GetIndex("sitecore_web_index").CreateSearchContext())
{
// Create the base search query
IQueryable<CustomSearchResultItem> query = context.GetQueryable<CustomSearchResultItem>()
.Where(item => item.TemplateName == "YourTemplateName");

// Add the facet to the query
query = query.FacetOn(item => item.Manufacturer);

// Execute the search and get the facets
var searchResults = query.GetResults();
var manufacturerFacetResults = searchResults.Facets.Categories.FirstOrDefault(x => x.Name == "manufacturer");
}

Process the facet results:

In the example above, the manufacturerFacetResults variable contains the facet results for the “manufacturer” field. You can now process these results to display the facet options to the users or apply further filtering based on user input.

Here’s an example of processing the facet results and displaying them as a list of options:

if (manufacturerFacetResults != null)
{
foreach (var facetValue in manufacturerFacetResults.Values)
{
string manufacturer = facetValue.Name;
int count = facetValue.AggregateCount;
}
}

Apply facet filters to the search query:

Based on user input, you can apply facet filters to the search query to narrow down the search results. For example, if a user selects a specific manufacturer from the facet options, you can add a filter to the search query:

string selectedManufacturer = "example";

using (var context = ContentSearchManager.GetIndex("sitecore_web_index").CreateSearchContext())
{
IQueryable<CustomSearchResultItem> query = context.GetQueryable<CustomSearchResultItem>()
.Where(item => item.TemplateName == "YourTemplateName")
.Where(item => item.Manufacturer == selectedManufacturer)
.FacetOn(item => item.Manufacturer);

var searchResults = query.GetResults();
}

I hope you found this helpful. 🙂

Custom database, custom index and ContentSearch

Lets go over how we can setup a custom database with a custom index then query it with Sitecore ContentSearch. You could also skip step 1 if you’re getting your data from somewhere else that’s not stored in Sitecore as items.

1. Create database

If you’re using SQL open Sql Server Management Studio and add a new database. In this case I’ll create it next to my Sitecore databases. Setup the tables how you want them. For demonstration purpose I’ll just setup a basic customer table. Here’s an image for reference to the code later on.

2. Create Solr core

At your Solr installation folder, go to <pathToSolr>\server\solr\ and duplicate the core directory for sitecore_master_index and rename to desired indexname, for instance:

  • companyName_custom_index

Go into the newly created folder and delete everything except the conf folder.

Next open up your Solr admin and add a new core by putting in your new foldername in previous step. Should look something like this.

3. Create Custom Index configuration

Now we need to create the index configuration for the core to connect with your Sitecore instance.

  1. Create a new .config file in your solution and add this sample configuration
<configuration xmlns:patch="http://www.sitecore.net/xmlconfig/" xmlns:role="http://www.sitecore.net/xmlconfig/role/" xmlns:search="http://www.sitecore.net/xmlconfig/search/">
    <sitecore>
        <contentSearch search:require="solr">
         <configuration type="Sitecore.ContentSearch.ContentSearchConfiguration, Sitecore.ContentSearch">
                <indexes hint="list:AddIndex">
                    <index id="scempty102_custom_index" type="Sitecore.ContentSearch.SolrProvider.SolrSearchIndex, Sitecore.ContentSearch.SolrProvider">
                        <param desc="name">$(id)</param>
                        <param desc="core">$(id)</param>
                        <param desc="propertyStore" ref="contentSearch/indexConfigurations/databasePropertyStore" param1="$(id)" />
                        <configuration ref="contentSearch/indexConfigurations/defaultSolrIndexConfiguration">
                        </configuration>
                        <locations hint="list:AddCrawler">
                            <crawler type="MyProject.Foundation.Indexing.Crawlers.MyCrawler, MyProject.Foundation.Indexing">
                            </crawler>
                        </locations>
                    </index>
                </indexes>
            </configuration>
        </contentSearch>
    </sitecore>
</configuration>

Create your Indexable class

namespace MyProject.Foundation.Indexing.Indexable
{
  public class IndexableCustomerField : IIndexableDataField
  {
    private readonly Customer _customer;
    private readonly PropertyInfo _propertyInfo;

    public IndexableCustomerField(Customer customer, PropertyInfo fieldInfo)
    {
      _customer = customer;
      _propertyInfo = fieldInfo;
    }

    public string Name
    {
      get { return _propertyInfo.Name; }
    }

    public string TypeKey => string.Empty;
    public Type FieldType => _propertyInfo.PropertyType;
    public object Value => _propertyInfo.GetValue(_customer);
    public object Id => _propertyInfo.Name.ToLower();
  }

  public class Customer
  {
    public int Id { get; set; }
    public string Name { get; set; }
    public int Age { get; set; }
    public string Email { get; set; }
  }

  //indexable class
  public class IndexableCustomer : IIndexable
  {
    private Customer _customer;

    public IndexableCustomer(Customer customer)
    {
      _customer = customer;
    }

    public void LoadAllFields()
    {
      Fields = _customer.GetType()
        .GetProperties(BindingFlags.Public
                       | BindingFlags.Instance
                       | BindingFlags.IgnoreCase)
        .Select(fi => new IndexableCustomerField(_customer, fi));
    }

    public IIndexableDataField GetFieldById(object fieldId)
    {
      return Fields.FirstOrDefault(x => x.Id.Equals(fieldId));
    }

    public IIndexableDataField GetFieldByName(string fieldName)
    {
      return Fields.FirstOrDefault(x => x.Name.Equals(fieldName));
    }

    public IIndexableId Id => new IndexableId<string>(_customer.Id.ToString());
    public IIndexableUniqueId UniqueId => new IndexableUniqueId<IIndexableId>(Id);
    public string DataSource => "Customer";
    public string AbsolutePath => "";
    public CultureInfo Culture => CultureInfo.CurrentCulture;
    public IEnumerable<IIndexableDataField> Fields { get; private set; }
  }

}

Create your Crawler class

This is just an example using a simple data provider with System.Data.SqlClient. Use whatever method you prefer. You could use an external API and index that data if it’s a viable way for your solution. That is up to you to figure out.

namespace MyProject.Foundation.Indexing.Crawlers
{
  public class MyCrawler: FlatDataCrawler<IndexableCustomer>
  {
    protected override IndexableCustomer GetIndexableAndCheckDeletes(IIndexableUniqueId indexableUniqueId)
    {
      return null;
    }

    protected override IndexableCustomer GetIndexable(IIndexableUniqueId indexableUniqueId)
    {
      return null;
    }

    protected override bool IndexUpdateNeedDelete(IndexableCustomer indexable)
    {
      return false;
    }

    protected override IEnumerable<IIndexableUniqueId> GetIndexablesToUpdateOnDelete(
      IIndexableUniqueId indexableUniqueId)
    {
      return null;
    }

    //If you get data from external api you could also save it to disk 
    //in a json file then return that list instead depending on the size.
    protected override IEnumerable<IndexableCustomer> GetItemsToIndex()
    {
      var customersToIndex = new List<IndexableCustomer>();

      string connectionString = "Data Source=(local);Initial Catalog=custom_Customer;User ID=<id>;Password=<password>";
      
       //Here i'm just using a simple Sql connection to showcase with some data. 
      //You would not really do this in a real case.
      using (SqlConnection connection = new SqlConnection(connectionString))
      {
        connection.Open();

        SqlCommand command = connection.CreateCommand();
        command.CommandText = "SELECT * FROM Customer_table";
        command.CommandTimeout = 15;
        command.CommandType = CommandType.Text;

        using (SqlDataReader reader = command.ExecuteReader())
        {
          while (reader.Read())
          {
            var customer = new Customer();

            customer.Id = reader.GetInt32(reader.GetOrdinal("Id"));
            customer.Name = reader.GetString(reader.GetOrdinal("Name"));
            customer.Age = reader.GetInt32(reader.GetOrdinal("Age"));
            customer.Email = reader.GetString(reader.GetOrdinal("Email"));

            customersToIndex.Add(new IndexableCustomer(customer));
          }
        }
        connection.Close();
      }
      return customersToIndex;
    }
  }
}

However you wish to execute this code is up to you. You could setup a schedule task that runs the code and add your data to the index. You’ll find your way and with real data you’ll probably have a more complex code.

4. Query Custom index

To query the custom index you need to extend the SearchResultItem with your own properties, for example

public class ExtendedSearchResultItem : SearchResultItem
  {
    [IndexField("name")]
    public string CustomerName { get; set; }
    [IndexField("age")]
    public int CustomerAge { get; set; }
    [IndexField("email")]
    public string CustomerEmail { get; set; }
  }

Then you just search against the index by creating a searchcontext that match your search result type.

public class SearchClass
  {
    public IEnumerable<ExtendedSearchResultItem> Search()
    {
      var searchContext = ContentSearchManager.GetIndex("scempty102_custom_index").CreateSearchContext();
      IQueryable<ExtendedSearchResultItem> queryable = searchContext.GetQueryable<ExtendedSearchResultItem>();

      queryable.Where(x => x.CustomerAge > 30); //insert your own predicate here.
      var searchResults = queryable.GetResults();
      return searchResults.Hits.Select(i => i.Document);
    }
  }

Publish-dates in Sitecore without itemextensions

I’ve read everywhere that you cannot get “first publish” and “last publish-date” from Sitecore out of the box and must write an extension for this. While true, I also believe you can use something else. Let me explain.

In my case I wanted to get “last publish-date” on an Article pagetype.
This page is indexed to the Sitecore_web_index when published.
And when being indexed Sitecore.ContentSearch sets __smallupdateddate field.

We can get this field in code from the ContentSearch API from the web_index and, voilà, we have the “last publish-date“.

In Sitecore.ContentSearch.SearchTypes.SearchResultItem we have the two properties

After your search just get the Updated property from your searchResult

result.Updated.ToString("yyyy-MM-dd", CultureInfo.CurrentCulture);

//output example
//2022-11-03


If an item is created and has not been published, it only exists in the master database.
You then edit the page and it might go through some iterations within your organization before approved workflow then publish.
It has now gone +4 days since you created it in master db.
Now if you publish the page/item it will now get a CreatedDate field in the Web database with the date at the publish.
This field will never change. So there you have your “first publish-date“.


This might not catch all scenarios but at least some. Hopefully you get use of it.

Solr Index issue – empty index periodically

If you have a working index and search result and you find that it starts to get empty all of the sudden on what seems to be an interval, Sitecore is probably rebuilding the entire index for you based on a job agent.

There is a default Threshold of 100k that tells Sitecore to trigger an index rebuild after publish:end event if you’re using that type of index strategy and if you’re using <CheckForThreshold>true<CheckForThreshold>.

When an index is being rebuilt, the index is empty during the rebuild. This will cause downtime on your search and is obviously not great user experience.

This is where you should use SwitchOnRebuildIndex (Sitecore docs here). It is a recommended practice to use SwitchOnRebuildIndex when CheckForThreshold is set to true. Go to <site>/sitecore/admin/showconfig.aspx to see what you’re using if you don’t know.
It’s located under

This can become an issue if you for instance have buckets with lots of items to index. So make sure that you switch to SwitchOnRebuildIndex on your index configuration.

Create rebuild core

You need to have a rebuild core for the index you want to use SwitchOnRebuildIndex on.

  1. Stop your Solr Service in Services or Task Manager -> service tab
  2. Go to <Solr_Folder>/solr-8.8.2/server/solr and create a copy of your desired indexfolder and and add _rebuild at the end like this.

  3. Go into the newly created copy folder and open core.properties file. Here you change the name of the core to match the folder name with _rebuild at the end.

  4. Now create a patch file for your index where you change the type and add the attribute for the new core
<configuration xmlns:patch="http://www.sitecore.net/xmlconfig/">
  <sitecore>
    <contentSearch>
      <configuration type="Sitecore.ContentSearch.ContentSearchConfiguration, Sitecore.ContentSearch">
        <indexes hint="list:AddIndex">
            <index id="custom_index" type="Sitecore.ContentSearch.SolrProvider.SolrSearchIndex, Sitecore.ContentSearch.SolrProvider">
                <patch:attribute name="type">Sitecore.ContentSearch.SolrProvider.SwitchOnRebuildSolrSearchIndex, Sitecore.ContentSearch.SolrProvider</patch:attribute>
                <param desc="core">custom_index</param>
                <param patch:after="*[@desc='core']" desc="rebuildcore">custom_index_rebuild</param>
            </index>
        </indexes>
      </configuration>
    </contentSearch>
  </sitecore>
</configuration>

Done

Start up your Solr service and open Sitecore.
Now your index should switch cores when being rebuilt. The core swap will happen automatically. You can verify this in your Solr instance admin UI and see that your index “custom_index” might now be located in the “custom_index_rebuild” folder. They will switch back and forth automatically and this is expected behavior.

Sitecore & Solr “connection lost”

Search was not working and when I went to the Solr admin page it said “Connection lost”. The exact reason for why this happened in the first place i’m still investigating. But to fix the error first was to reset the Solr instance and recycle the App pool of the site.
You can do this by command line or from services window and locate your Solr service, right click -> restart.

Select the service and right-click -> restart

After this I confirmed my Solr was spinning correctly by visiting the admin page again, but it still didn’t work. I looked up the indexing manager in Sitecore configuration from the dashboard. This showed empty. No indexes.

Still confused, I found this post on StackExchange with the below answer:

  • Make sure your Sitecore configured properly for SOLR within \App_Config\Sitecore\ContentSearch
  • Check your connectionstrings for SOLR is configured properly or not
  • Access SOLR admin (with browser, make sure it’s https) to check whether it’s on or not
  • If it’s on, check again if your configured index matches with SOLR Core Admin
  • If everything’s ok, can try to recycle app pool for your site and wait a few minutes Check again from the control panel

The last point worked for me, I recycled the app pool and things started working properly again.

Hopefully this helps if you get similar problems.

Get items from Bucket in Sitecore

I need to get items from a big bucket.
For best performance you should get the items through Sitecore ContentSearch.

Here I have some example code how to get a selection of items from a bucket.
Let’s say I want to get items that has a specific Tag on a field, which in this case is a string type field. (You can of course change the queryable to whatever you like)

List<Item> ResultsItems = new List<Item>();
IIndexable index = new SitecoreIndexableItem(bucketItem);

using (var context = ContentSearchManager.GetIndex(index).CreateSearchContext())
{
   var results = 
     context.GetQueryable<T>().Where(x => x.TagFieldName.Equals("TagName"))).GetResults();
   
   foreach (var result in results)
   {
     Item item = result.Document.GetItem();
     if(item !=null)
     {
       ResultsItems.Add(item);
     }
   }
}

Now ResultsItems are filled with the item context of all the children of the bucket.

Note: I’m showing the code for demonstration purpose. Beware of potentially calling a GetItem() on potential thousands of items.
I would also recommend selecting the fields you are after with .Select(i => new { i.FieldA, i.FieldB}) (read more here) so that the query gets smaller.

Using InfluxDB for monitoring Sitecore’s Solr PART 1

Heard of InfluxDB before and what is it used for?

InfluxDB is an open-source time series database (TSDB) developed by the company InfluxData. It is written for storage and retrieval of time series data in fields such as operations monitoring, application metrics, Internet of Things sensor data, and real-time analytics.”
Wiki

So it’s a perfect tool to save a bunch of data and use in fancy graphs or diagrams (or excel…). I for one love this.

So how can we use this with Sitecore?

In this first part i’ll show how we can monitor our Sitecore’s Solr instance and use the graph dashboard built-in for InfluxDB. In a later part I will show how we can query or write to influxDB for data and present it in Sitecore.

I’m using this as an example to hopefully inspire some ideas of your own.

In InfluxDB there are lots of plugins you can install to monitor your Solr, MongoDb etc. I’m going to show how you can easily setup and monitor your Solr instance with InfluxDB.

But the options are endless, you could save the data and present whatever data you want in fancy graphs. For example, you want to collect Sitecore editor data on item events by hooking up to the events pipeline. Or make diagrams of graphs when visitors hit your 404-page.

1. Install InfluxDB

I’m using the Windows Open Source version. Follow the installation guide here.

You need to run the influxd.exe and go to your http://localhost:8086/ (the default port) and there you can set up your organisation, bucket, and user in the interface.

  • Bucket: Think of this like a database. It’s not really but just to get an idea.
  • Organisation: This is your identifier for you influx application
  • Measurement: Think of this like a table.

Here is some glossary for InfluxDB https://docs.influxdata.com/influxdb/v2.2/reference/glossary/

2. Install Telegraf

Telegraf is an open source plugin-driven server agent for collecting and reporting metrics. It enables flexible parsing and serializing for a variety of data formats (such as JSON, CSV) and can serialize the data in InfluxDB. It enables some +300 plugins that you can use with InfluxDB.

Go to 
https://docs.influxdata.com/telegraf/v1.23/install/?t=Windows and download the latest version of telegraf. Follow the installation guide.

3. Setup Telegraf config & Solr Plugin

Go to where you downloaded telegraf and open the telegraf.conf

Start up your influxdb and go to the dashboard, from there go to “Data -> Telegraf -> InfluxDb Output Plugin“.

Copy to clipboard and replace this section in your telegraf.conf file to match your influxDB setup. Generate Token if needed or use your existing one.

Find # [[inputs.solr]] in telegraf.conf and uncomment so your section looks more like this and save.

# # Read stats from one or more Solr servers or cores
 [[inputs.solr]]
#   ## specify a list of one or more Solr servers
   servers = ["http://localhost:8983"]
#
#   ## specify a list of one or more Solr cores (default - all)
   cores = ["main"]
#
#   ## Optional HTTP Basic Auth Credentials
   username = "username"
   password = "pa$$word"

And set the servers, cores and credentials so it matches your solr instance.

As the documentation shows, if you’re installing on windows it needs to be installed as a service.

.\telegraf.exe –service install –config “\telegraf-1.23.0\telegraf.conf”
.\telegraf.exe –service start

You can test your connection with:
.\telegraf.exe –config “<yourPath>\telegraf-1.23.0\telegraf.conf” –test

4. Setup Dashboard in influxDB

Go to Dashboards and create a new Dashboard. Name it then add a cell.

Here I’m adding a query to the “lookups” field on my selected core. Then press top right to save it.

You can set the cell names also.

So with some experimenting I’ve now setup some monitoring for my Solr instance with some simple cells. When you get more knowledge how to work with influxDB you can build and merge cells with different queries to present more valuable data. You could also open up InfluxDB to other users on your server now or setup alerts etc.

Other sources of information

Templates Here you can find community made templates for influxDB like

  • monitoring your Redis Server
  • view data for your MongoDB
  • monitoring your docker containers
  • and many more. Check it out!

Hopefully you found this information useful and inspiring.

Stay tuned for Part 2 where I’ll get into some more in-depth how to write and query to influxDB for Sitecore related data.

Sitecore Solr – Select specific fields with LINQ to Sitecore

If you’re expecting a lot of results from a Solr query, it can be quite a perfomance hit.
If you then only really need 1 or 2 fields from the document, there is a neat way with LINQ to Sitecore to select only the fields you need.

var items = searchContext.GetQueryable<BaseSearchResultItem>().Where(i => i.TemplateId == <templateid>).Select(i => new { i.Heading, i.ItemId }).ToList();

By using the .Select() you can specify which fields you want to get from the document.
This query will result in a Solr query like following:

?q=(_template:(<templateId>))&start=0&rows=1000000 &fl=headingFieldName,_uniqueid,_datasource&fq=_indexname:(sitecore_master_index)

In Solr it’s called “Field List” or “fl” and in Solr UI you can test the effect before compiling your code like this, which I prefer to do.

Good luck with your Sitecore Search.

Sitecore Solr Sort Alphabetically

Just a short and quick blogpost. I got an issue with my alphabetically sort.
This was because my field was tokenized and of type text in Solr. So I had to make the field Untokenized and returnType string. Fixed!

With Sitecore you can pretty easy sort by Ascending or Descending with LINQ to Sitecore
Just write an OrderBy or OrderByDescending with your field like so:

switch (direction)
{
  case SearchOrderDirection.Ascending:
    return queryable.OrderBy(i => i.Title);
  case SearchOrderDirection.Descending:
  default:
    return queryable.OrderByDescending(i => i.Title);
}

REMINDER: The field should be UNTOKENIZED and returnType string.