In this post, we’ll discuss defining your buyer-customers companies and how you can provide certain companies with better pricing on products.
A common scenario would be having anonymous or standard customers who receive the standard pricing for a product. Then, you have a logged-in buyer-user assigned to a company, which you define as a “large-volume” customer, for whom you want to offer better pricing on your products, like a 10% discount, etc.
In this post, I’ll be using my Vercel Marketplace that I set up with this video guide from Sitecore: https://www.youtube.com/watch?v=3bHgafJShGM
Setting up a buyer
The most common way to set up “companies” in Sitecore OrderCloud is to make them as individual Buyers. This is so that you can set elevated roles on the buyer if needed.
Go to the API Console in your OrderCloud portal: https://portal.ordercloud.io/console
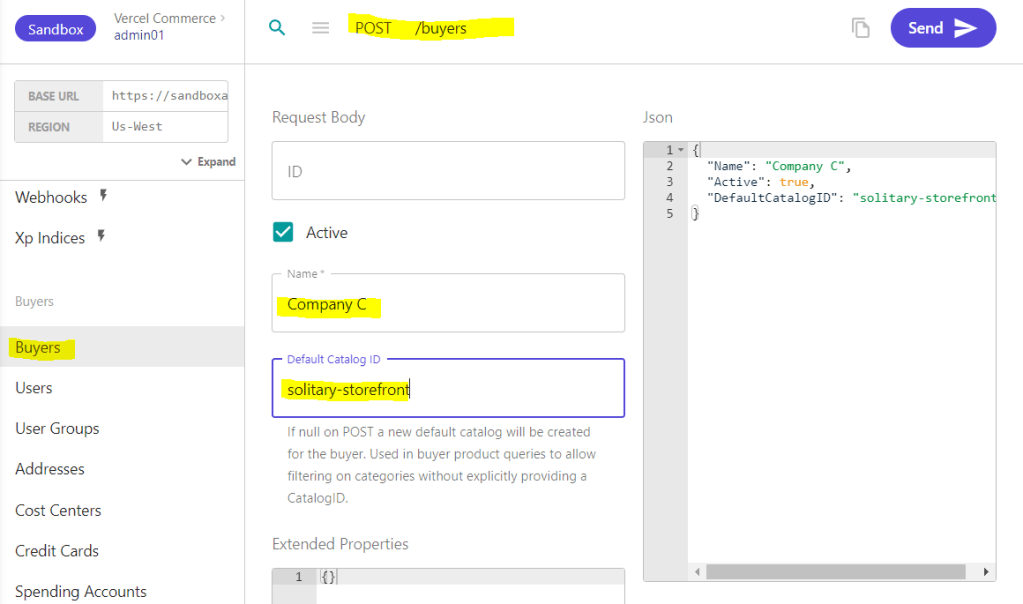
Go to Buyers, change the request to POST – Create a new buyer, and set the desired company name, a Default Catalog ID and Active to true, then press Send. This should return a 201 with some additional information about the company, like its assigned ID, etc. You’ll need that ID going forward.
In this case I only have 1 catalog. If I don’t set a Default Catalog ID, OrderCloud will create a new one for this company. Since I don’t want that I’ll set the Default Catalog ID
Setting up a User
Next, you want to set up a User in that company. So, go to Users and set the request to POST – Create a new user.
Fill in the required fields for the user, as seen in the image, and the Buyer-ID should be the ID you got when creating the company in the previous step.

Setting up a Security Profile
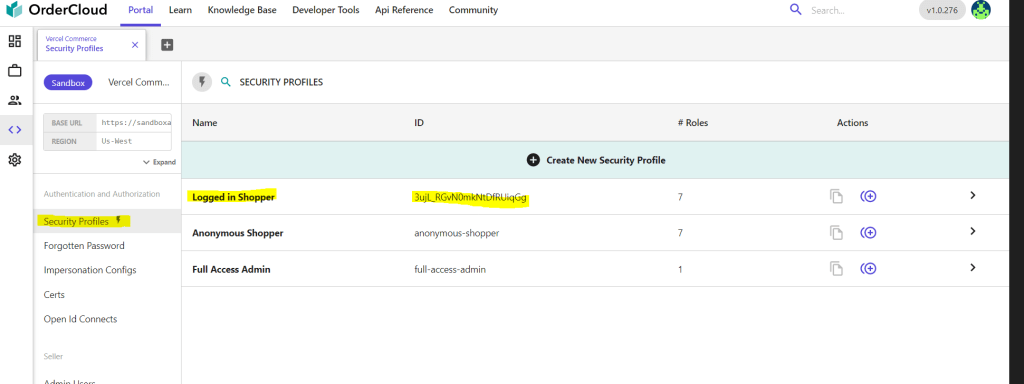
If you already have your security profiles defined, you can skip this. Otherwise, go to Security Profiles, and here I’ve created a profile called Logged-in Shopper. This could be defined however you want. Maybe one Security Profile per company, etc.
Here, I’m just going with a general approach for now, and I’ve given it some standard shopping and buyer roles.

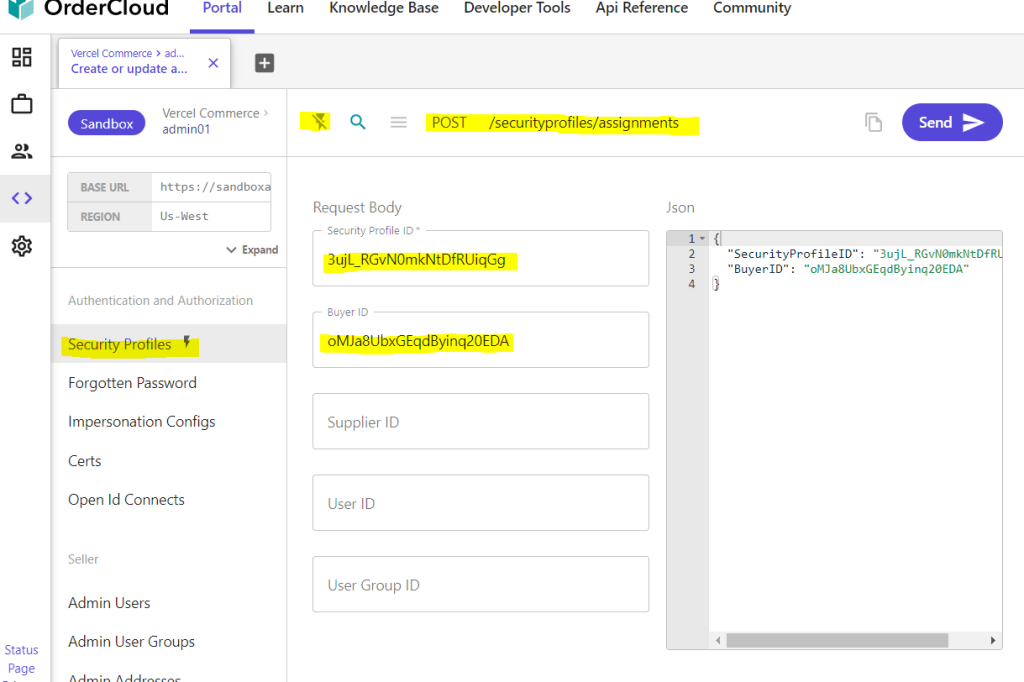
Now lets assign this profile to our company so all it’s users get the roles we’ve setup. Stay on Security Profiles and shut off the Enhanced UI (the thunder icon).
Change the request to POST – Create or update a security profile assignment
Set the ID of your Security Profile, in my case the ID of Logged in Shopper, in the “Security Profile ID” and the ID of my company in “Buyer ID” and SEND.
Now we should have a new company, a user tied to that company and set roles for that company and it’s users.
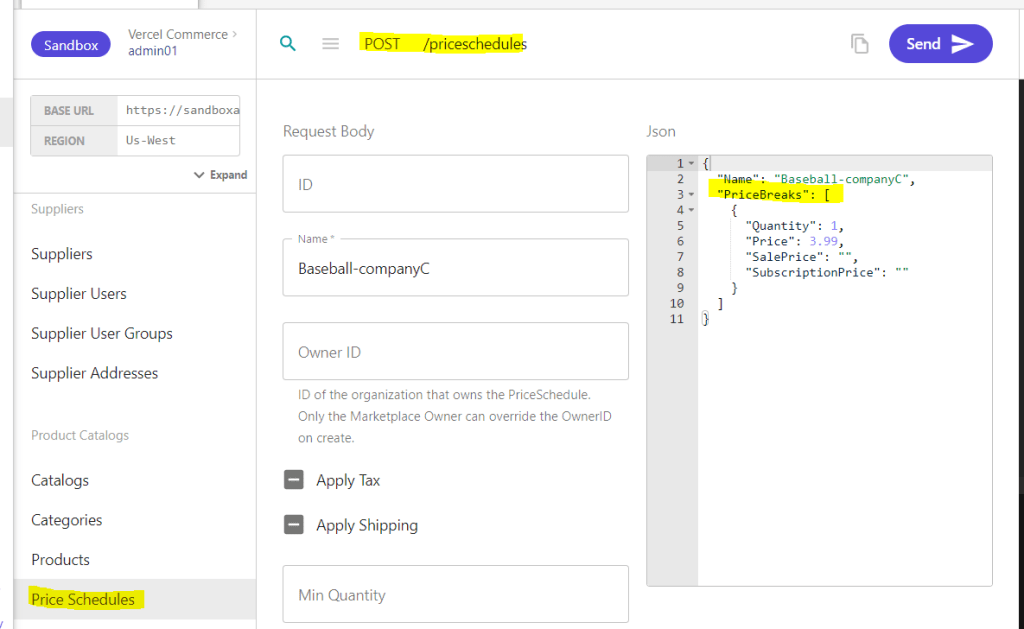
Create Price-Schedules
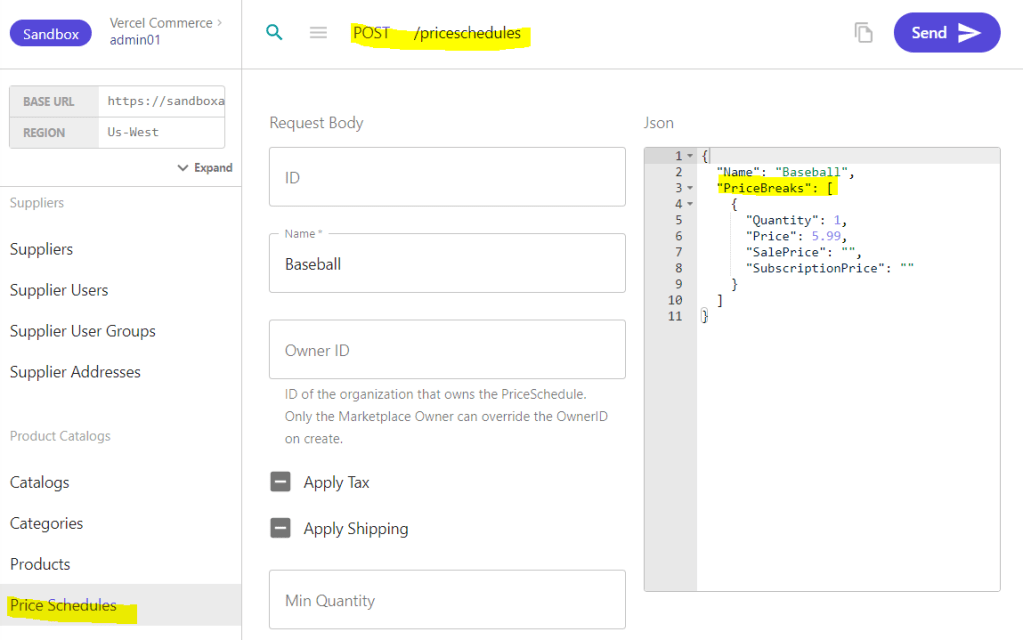
Normally I would create my product first then the Price schedules. But since I would be jumping back and forth, I’ll start by creating the price schedules for a product called “Baseball“.
I’ll create two price schedules. One for the standard price, which goes for 5.99, and one for my buyer, which costs 3.99, as you can see below.
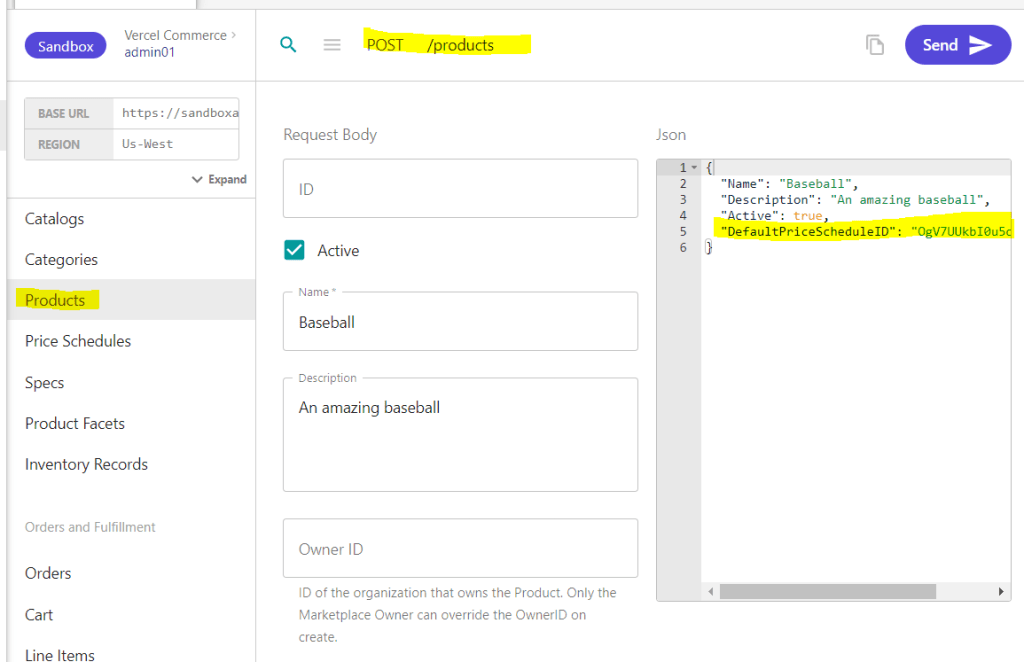
Create a product
Go to Products and make a POST – Create a new product.
Fill in the required info and what else you want and make it active. In the DefaultPriceScheduleID, you want to set the ID of the standard price schedule, the one for 5.99.
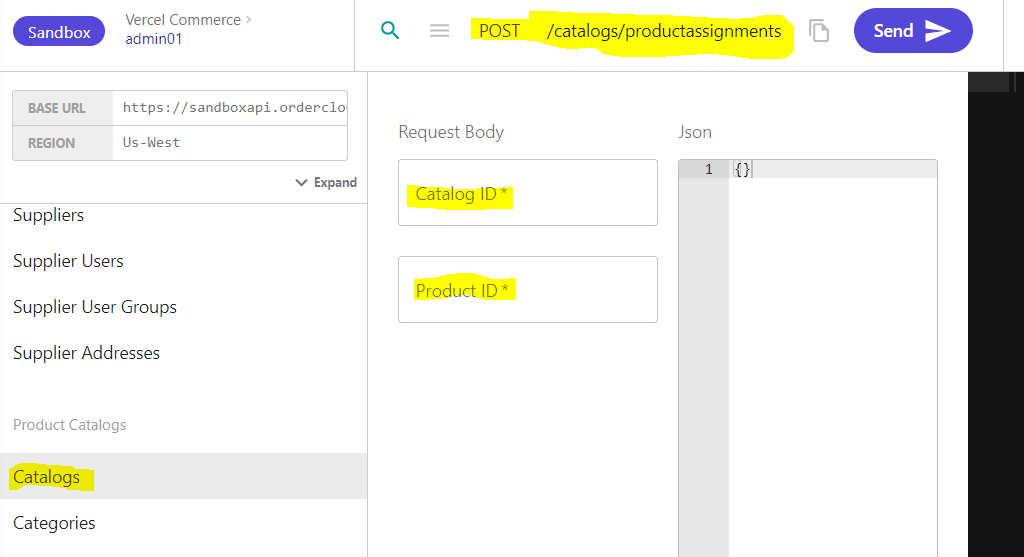
Before we make the price schedule assignment we need to assign our new product to a catalog. Otherwise we’ll get an exception 🙂
So go to Catalogs and put in your catalog Id and your product Id for the new product. When we created our buyer/company we set the default catalog Id. It should be the same Id here in this case.
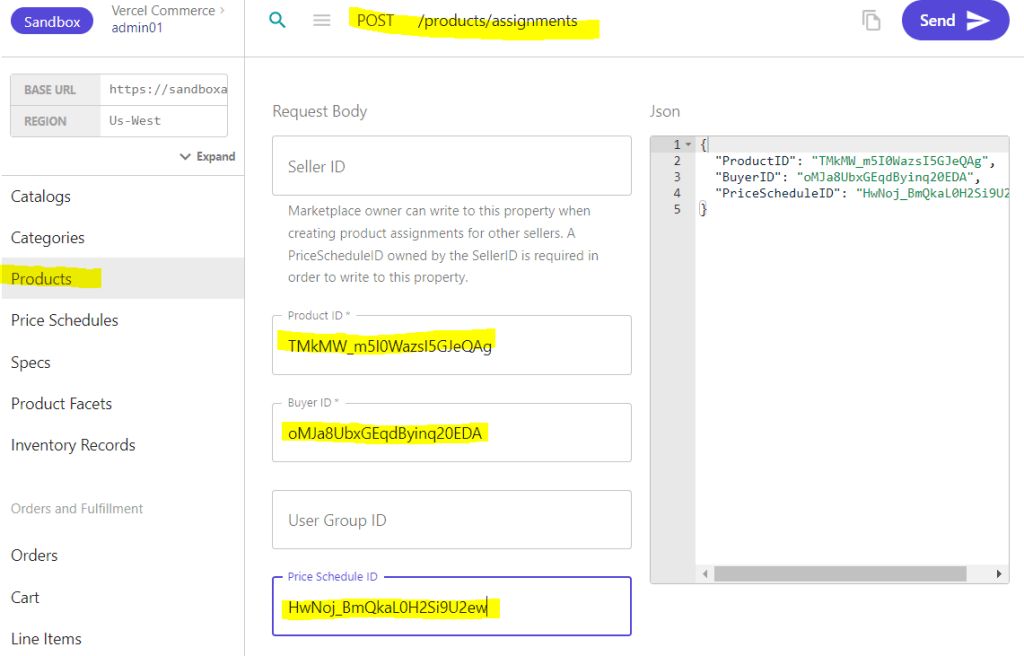
Now we want to make a price schedule assignment with the Product ID and our Buyer ID. This can be done like in the image below.
Lets review
Here’s what we’ve done:
- Set up a Buyer
- Set up a User
- Set up a Security Profile
- Create Price-Schedules
- Create Product
- Assigned Product to Catalog
- Assign Price-Schedules
It’s time to see it in action.
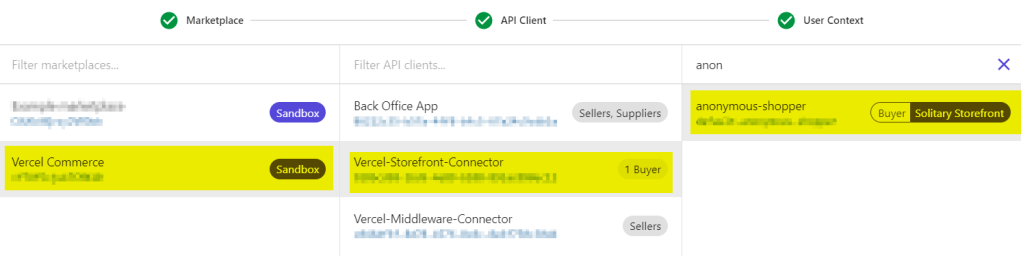
Let’s get the product as an anonymous user by switching my user context to an anonymous shopper – a user that has no connection to any company.
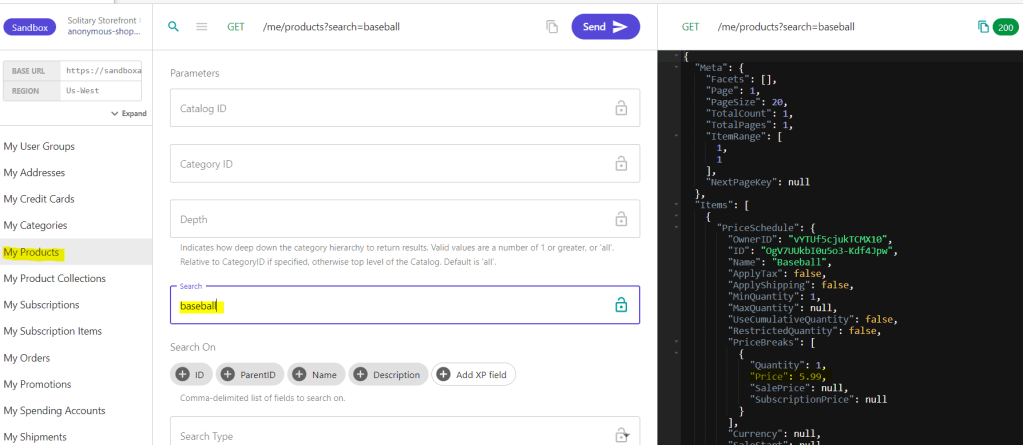
Then go down to the “Me and My stuff” section and call the “My Products“. As you can see in the JSON response, the Price is 5.99.
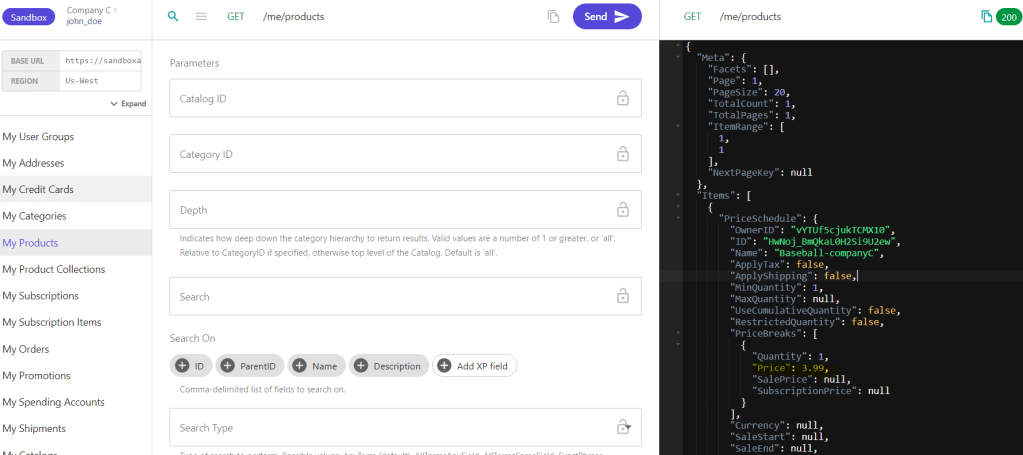
Now lets do the same, but as a context user that belongs to our company – the one we created at the beginning of this post.
Then, do the same request in “My Products” to see if the price has changed to 3.99. This is because OrderCloud will give me the appropriate price schedule from the buyer user.

Thanks for reading and hope this helps!
If you like, you can check out my Youtube version of this blogpost – https://www.youtube.com/watch?v=AnU6aBTiL_Y
Resources
https://ordercloud.io/knowledge-base/same-product-multiple-price-schedules
https://ordercloud.io/knowledge-base/catalog-visibility-rules
https://ordercloud.io/knowledge-base/product-visibility
Thanks to the OrderCloud team on Slack
