Upgrading Sitecore XP 10.2 to 10.5 – lessons learned

Back on-prem, and straight to 10.5

I’ve spent the last years mostly in SitecoreAI and XM Cloud land. Then I got a project where they needed an upgrade, and suddenly i was back in IIS, SIF and web.config again.

The plan was originally 10.4, then 10.5 landed and we decided to skip straight to it. Since 10.1 you can upgrade directly to any later version so no need to hop through 10.3 and 10.4 on the way.

This post is about why 10.5 is worth it, where it bit me, and a checklist for your own upgrade.

Why 10.5, and is it actually faster?

Sitecore XP 10.5 shipped on 5 August 2026. It’s not a release full of shiny authoring features. It’s more a hardening and housekeeping release.

Faster where it counts

The performance list in the release notes is better than I expected:

  • MVC rendering is faster in environments with many sites. Running multi-site on one instance? This one’s for you.
  • Cache removal by predicate no longer takes a global lock, so a big cache clear doesn’t make everything else wait in line.
  • CompositeDataProvider now caches its path resolving.
  • Recycle Bin cleanup of archived items is batched, instead of one huge delete.
  • Profiling processors for placeholders and renderings are switched off on CD servers. Less overhead on every rendering, for free!
  • Solr optimize no longer runs after every index operation, so indexing jobs finish sooner. Schedule it yourself if you need it.

Safer

This is the real reason to upgrade. 10.5 patches a critical pre-authentication XAML cache poisoning issue and a post-auth remote code execution chain. BinaryFormatter is gone, replaced with JSON serialization. The Package Installer is disabled by default, which shrinks the attack surface (but at the same time “killing” an old time favourite, though it can be enabled again through configs).

There’s also a nice publishing fix: incremental publish no longer skips items because of a race condition. If you’ve ever had “why didn’t that item publish?” tickets, you know.

One infrastructure lift instead of two

10.5 supports SQL Server 2025, Solr 10 and Windows Server 2025, and drops SQL Server 2019 and Solr 8/9. That sounds like extra work, and it is. Landing on 10.4 would have meant doing the Solr and SQL lift again in a year or two.

Lessons learned the hard way

Most of my time didn’t go to Sitecore itself. It went to the tools around it, and to years of build habits that 10.5 no longer tolerates.

The approach: start from a clean 10.5

Instead of upgrading the old instance in place, start fresh and bring your databases over:

  1. Install a clean Sitecore XP 10.5 with the installation wizard (SIA).
  2. Restore your old 10.2 databases next to it.
  3. Run the upgrade scripts from the 10.5 upgrade files zip against them.
  4. Switch your connection strings to the upgraded databases.
  5. Publish your solution to the website folder.

This should allow the site to run with the upgraded databases. And you get a clean 10.5 install to compare against, which comes in handy later in the build part.

The clean install: SQL Server 2025 meets Web Deploy

The installation wizard runs SIF under the hood, so this hits you already in step 1.

Web Deploy can’t deploy the databases. This was the biggest time thief of the whole project. Web Deploy 4.0’s database provider dates from around 2017 and doesn’t recognize modern DacFx. Against SQL Server 2025 it fails with ERROR_DACFX_NEEDED_FOR_SQL_PROVIDER, whatever you install.

I tried registry keys, copying DLLs around and a full Visual Studio with SSDT. Nothing helped. What worked was skipping the databases in SIF and deploying them myself:

  1. Set "Skip.Install.Databases": true directly in the child configs (xconnect-xp0.json, sitecore-XP0.json). The XP0 wrapper config doesn’t pass the parameter down.
  2. Publish each dacpac from the WDP package with SqlPackage.
  3. Create the SQL users yourself, with the passwords SIF wrote into ConnectionStrings.config.

Test this before you start a long install run. If this throws, go straight to the workaround:

& "C:\Program Files\iis\Microsoft Web Deploy V3\msdeploy.exe" -verb:dump -source:dbDacFx=nonexistent.dacpac -verbose

A few smaller ones:

  • Run SIF from Windows PowerShell 5.1 as admin, not PowerShell 7. In pwsh the IIS and DISM cmdlets break in confusing ways.
  • SQL Server 2025’s self-signed certificate isn’t trusted by default. Add TrustServerCertificate=True to every connection string, or install a proper certificate.
  • SIF copies your license file but doesn’t rename it. It has to be called license.xml, in every folder, including xConnect’s job folders.
  • On newer IIS, SIF 2.4.1’s website start/stop task fails with “The property ‘Value’ cannot be found”. A small patch in Invoke-ManageWebsiteTask.ps1 fixes it.
  • Solr 10 requires Basic Auth. Edit security.json as plain text, not through a ConvertFrom-Json round trip. A broken file gives you Solr’s own 404 page, which looks like a wrong URL.

The build: .NET 4.8.1 and the vanishing dependencies

10.5 targets .NET Framework 4.8.1. The NuGet packages give a hard NU1202 error on 4.8. Bump TargetFrameworkVersion in every csproj and install the 4.8.1 Developer Pack on every build machine.

Sitecore.Kernel stopped leaking dependencies. 10.2 pulled in HtmlAgilityPack, Newtonsoft.Json, System.Linq.Async, PdfSharp and friends transitively. 10.5 doesn’t. Code that compiled for years suddenly can’t find a type. It’s not a code bug, just add the package to that project and move on.

Sitecore’s web.config then promised a version in a binding redirect that wasn’t on disk, and the app domain wouldn’t start. The fix was to pin those packages to the versions Sitecore ships, in one shared .targets file every project imports.

Don’t find the drift one crash at a time like I did. Diff your webroot against a clean 10.5 install and get the whole list at once:

Get-ChildItem "$cleanBin\*.dll" | ForEach-Object {
$deployed = Join-Path $deployedBin $_.Name
if (-not (Test-Path $deployed)) { return }
$ref = [Reflection.AssemblyName]::GetAssemblyName($_.FullName).Version
$dep = [Reflection.AssemblyName]::GetAssemblyName($deployed).Version
if ($ref -ne $dep) { "$($_.Name): clean=$ref deployed=$dep" }
}

Not every difference is a problem. Packages your own code references on newer versions can stay. And a few assemblies, like System.Web.Http, are listed with an exact version in Sitecore’s <compilation> section. Lowering the redirect won’t help there, the DLL on disk has to be that version.

Let AI help you find the drift. Connect the Sitecore docs MCP in VS Code or Cursor (I wrote about how to set it up here) and use it together with the AI in your editor. Give it the diff output, your csproj files and web.config, and let it find broken package versions or references to wrong dll versions etc. Much faster than going through 70 projects by hand! You could probably even point it to this blogpost to help you get started.

The first boot: one bug at a time

Clean out your old hotfixes. Our hotfix package list still had 10.2 cumulative fixes and security patches in it. If they are resolved, clean it out.

Read the event log, not the browser. With customErrors on, every failure looks the same: a redirect to 500.html. The real exception was in the Windows Application event log (source ASP.NET, event 3005). Fix one thing, publish, read the new entry. It was almost always a different bug. We had six in a row.

Two more event log tricks:

  • An entry with no stack trace and an “access exception” usually means file permissions.
  • An entry cut off mid-sentence hit the event log’s ~30 KB limit. Set customErrors to RemoteOnly for a moment and open the URL on the server to see the full error. Then set it back.

Hunt for stale environment values. A site definition hostName with no Debug transform, so the site resolver fell back to the empty default site. And an old xConnect hostname and certificate thumbprint in the connection strings.

That last one was sneaky. Every Experience Editor ribbon button builds an xConnect client in a static constructor. One missing certificate poisoned the type, and the whole ribbon spun forever. Search App_Config for old hostnames, prefixes and thumbprints before you start testing.

The databases: ownership, shards and warm-up

Shard maps remember where they used to live. Moving the xDB collection databases? If you’re moving from another SQL host, e.g. Azure SQL. The shard map manager stores server and database names in __ShardManagement.ShardsGlobal, and every shard has its own copy in ShardsLocal. Update both, or xConnect’s health check times out against the old server.

Warm up xConnect. xConnect takes 1–3 minutes to start after a recycle. Requests in that window got a bare IIS 500.0 with 0x80070032. Turn on IIS Application Initialization: AlwaysRunning, preloadEnabled, and /healthz/ready as the initialization page. Now requests wait instead of failing.

One gotcha there: if the site only has an HTTPS binding, set enabledProtocols to https. Otherwise preload never fires.

My checklist if you’re doing the same

If I would do this again tomorrow, this is the order I’d go in:

  1. Read 10.5’s own upgrade guide. From 10.1 and up you upgrade directly, so use the 10.5 upgrade files zip, not the ones for 10.3 or 10.4. The UpdateApp tool is only needed for modules like EXM and SXA.
  2. Start from a clean 10.5: install it with the wizard, restore your old databases, run the upgrade scripts, switch connection strings and publish.
  3. Check every module against the compatibility table before you commit to a date.
  4. Line up the infrastructure: SQL Server 2022 or 2025, Solr 10 with Basic Auth, and time for a full reindex. The Solr schema file is now called managed-schema.xml.
  5. Pre-flight the server: Windows PowerShell 5.1 as admin, W3SVC and WAS running, and the msdeploy test from above.
  6. Search your code for Sitecore.Convert and FileUtil.LoadObject/SaveObject. With BinaryFormatter gone they return null or silently do nothing. Also look for GraphQL Playground references and ParallelForeachProxy overrides.
  7. Bump to .NET 4.8.1, pin shared packages in one place, diff your bin against a clean install, and let AI with the Sitecore docs MCP go through the drift.
  8. Empty your old hotfix list, then check if 10.5 needs patches of its own.
  9. Check environment values: hostnames, certificate thumbprints, license.xml, TrustServerCertificate.
  10. Warm up xConnect and make sure /healthz/ready says Healthy before anyone starts testing.
  11. Regression test the changed defaults in the table below.

Defaults that changed in 10.5

SettingNew behaviourWhat to do
Publishing.CheckDuplicateNameOnPublishtrue: items with a duplicate sibling name are skipped, with a warning in the logSearch publish logs for skips, or set it to false
Package Installer and DesignerDisabled by defaultDeploy zSitecore.InstallPackage.Enable.config where you need it
DeviceDetection.PerformanceProfileBalanced instead of LowMemory, uses more memorySet LowMemory on tight servers
Solr optimizeNo longer runs after index operationsSchedule it if you need it
Application InsightsInstrumentation keys removedUse AppInsightsConnectionString

The full list is in the breaking changes for 10.5. It’s worth reading the whole page, it’s not that long.

Wrapping up

Was it worth skipping 10.4? For us, yes. One infrastructure lift, a much better security baseline, and some real performance work under the hood.

Most of the pain wasn’t 10.5’s fault. It was old tools meeting a new SQL Server, and years of build habits finally catching up. Once that was sorted, the site came up and we moved on to functional testing.

After two years in SitecoreAI, it’s also a good reminder of everything SaaS takes off your plate. But plenty of XP sites will be around for years, and 10.5 is a good place for them to land. If you’re still on 10.2 or older, don’t wait for the next one.

Hit something I didn’t? Let me know, would love to hear about it!
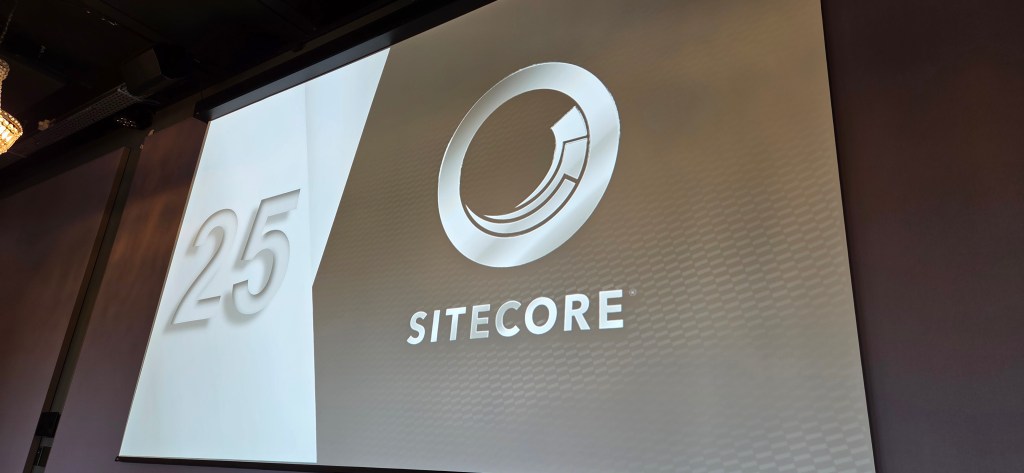
Celebrating 25 Years of Sitecore in Copenhagen

I had the privilege of attending Sitecore’s 25th anniversary celebration at H.C. Andersen Slott in Copenhagen last week.

The event began with a keynote from Sitecore CEO Eric Stine, who reflected on Sitecore’s 25-year journey while also outlining the company’s vision for the future. He emphasized the growing importance of AI and how Sitecore is positioning itself at the forefront of the modern DXP landscape.

Eric discussed how customer behavior is changing and how AI is increasingly influencing how users discover brands and websites.

Scrunch is an AI search optimization platform that helps brands become more discoverable and accurately represented in AI-generated answers. Today customers search for information through ChatGPT, Claude or Mistral Vibe for example. If they ask for top 3 companies that do X, if you’re not represented in that result you will miss out on potential customers.
This is where Scrunch comes in, helping companies improve their visibility in AI-driven search experiences.

With products such as Sitecore AI, Content Hub DAM, Search, CDP, Personalize, and OrderCloud, Sitecore continues to invest heavily in its platform and future roadmap.

The day featured several sessions, including one from Liz Nelson, VP and Head of Growth Engineering.
She shared insights into the evolution of Sitecore AI and the journey that has led to its current capabilities.

We also had the opportunity to attend a fireside chat featuring two of Sitecore’s founders alongside CEO Eric Stine and CMO Michelle Boockoff-Bajdek.

The final session of the day featured Thomas Eldblom from Pentia, who discussed the importance of data and context as foundational elements in the AI era.
He highlighted the value of a shared data platform, where organizational data can be consolidated and made accessible through MCPs, enabling AI systems to deliver more meaningful and context-aware outcomes.

Finally, I would like to thank Sitecore for hosting such a great event. Congratulations on reaching this 25-year milestone, and here’s to many more years of innovation and success.

SitecoreAI Environment Indicator – Chrome extension

Link to extension:
https://chromewebstore.google.com/detail/sitecoreai-environment-in/gddjdkcoaobibocfcbkjjgklapdcaadp

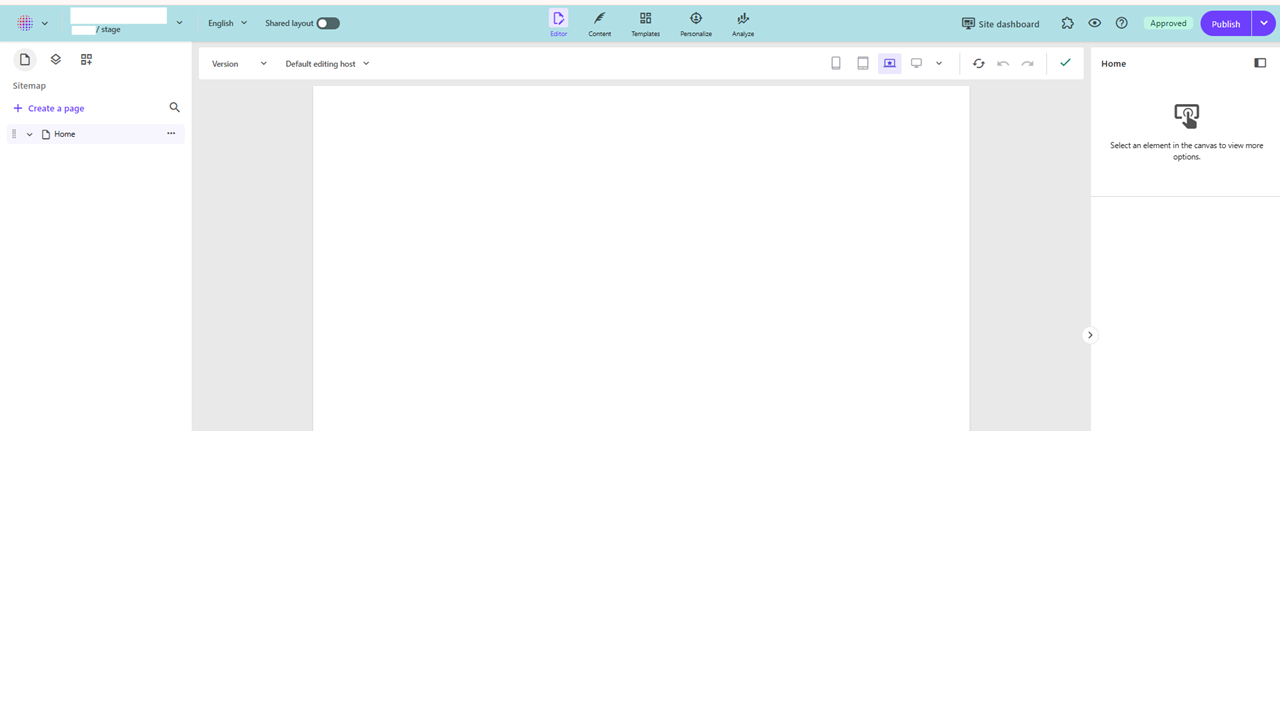
Have you been in SitecoreAI page builder and ever felt like you forgot which environment you were working in? Stage or production for instance.

You don’t want to find yourself working in the wrong environment!

Usually you might keep yourself to one environment so it’s not that much of an issue.
But as a developer i’m often in both.

In page builder everything looks exactly the same except a small label where it says “stage” or “production”. Or you can see it within the url. But I wouldn’t say that it stands out very much, especially not for editors.

So I thought, how can I make it stand out more, which environment I’m in?

So for anyone using Chrome I made a Chrome extension thats been published on the Chromewebstore.


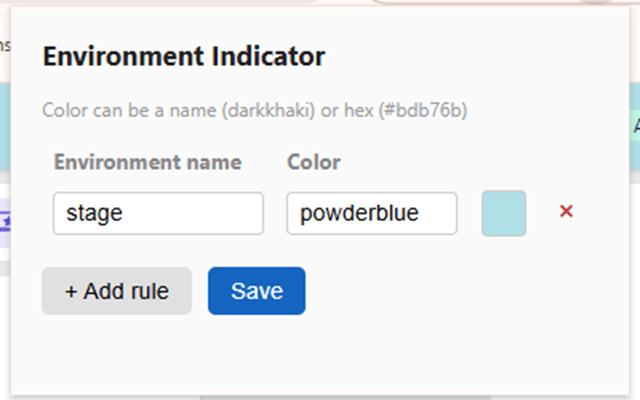
It uses a rule based approach where you can associate by text which environments you want with a color. If it finds a match, it will append the background color on page load.
You can define multiple rules with any environment and colors.

You can find it here:
https://chromewebstore.google.com/detail/sitecoreai-environment-in/gddjdkcoaobibocfcbkjjgklapdcaadp

Setup a A/B/n test in SitecoreAI

In a previous post I wrote about Sitecore A/B/n test and the more text about it and how it works and why to use it etc. If you’re intrested here’s a link: HERE

In this post I want to give you some clear examples on how to setup a A/B/n test in Page builder in SitecoreAI.

1. Create your hypothesis

You should define a clear hypothesis and goal before starting an A/B test. The hypothesis should describe what change you are making, what outcome you expect, and how success will be measured. Even small changes, such as a new headline or a different button position, can be tested if they are tied to a measurable goal.

For example:

“By using a more engaging headline, we expect to increase engagement on the product page.”

2. Create the A/B/n test in Page builder

Select the component you want to test and press the “vial” icon. (Look at bottom of the post for troubleshooting if your missing the Vial icon)

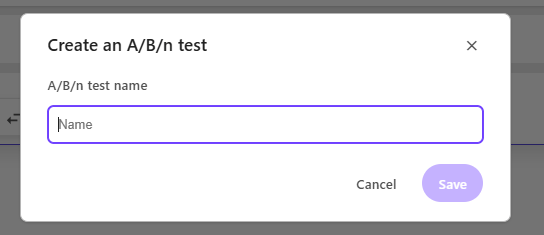
You will be prompted to set a name for the test:

3. Configure your variants

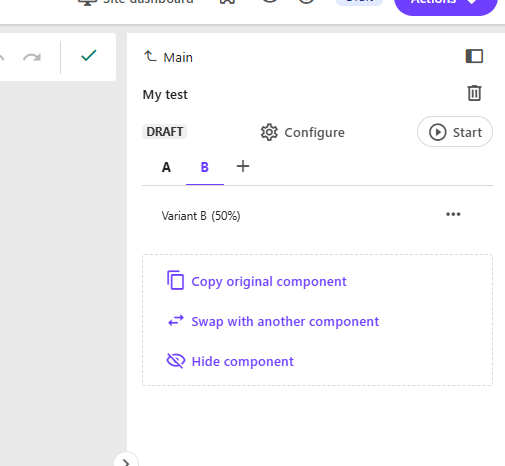
In the right pane window you will now see the window for your created A/B test. In here you can create more variants if you want to. Up to a maximum of 6 variants.

Either you “Copy the original component”. Meaning you take in what’s in the original control (Variant A) and to get started quickly, with maybe editing a text or other design elements you can change on your component.

Or you can “Swap with another component”, if you’re hypothesis is that another component will increase page views etc.

Finally you can just “Hide component” if you believe you get more engagement without that component on the page.

Remember that A/B/n testing is about testing your hypothesis. Even though it might be “We don’t know which of 3 variants will generate most engagement”. You can still test it.

Configure the test

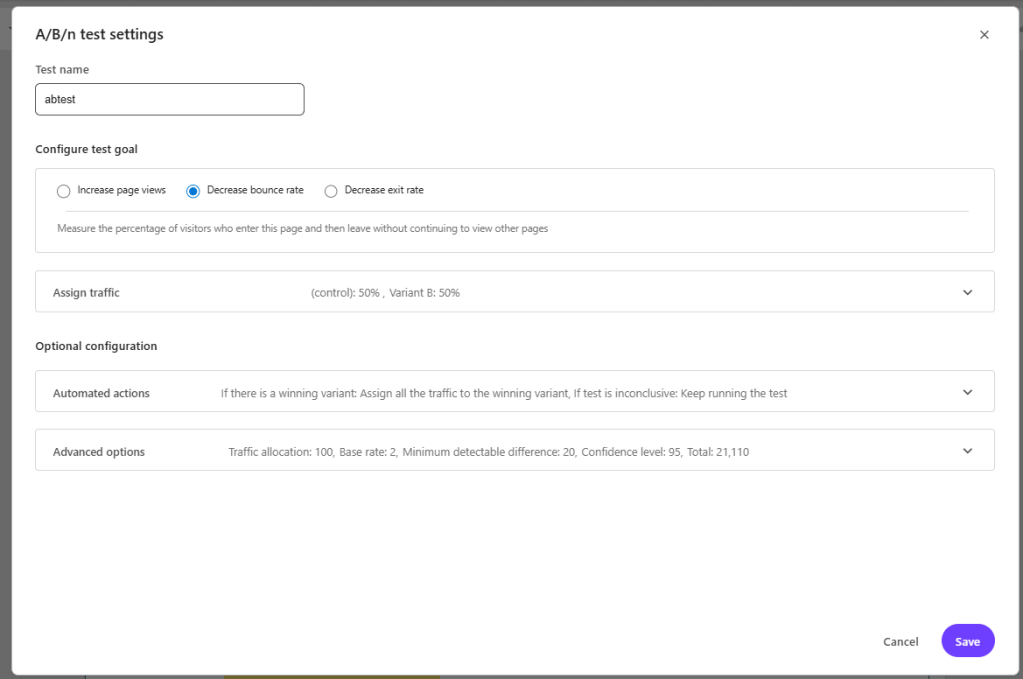
There are 4 configurations we can make in the test. By pressing “configure” we get this pop-up.

1. First you Configure the test goal – By selecting what you want to measure. Increase page views, Decrease bounce rate or Decrease exit rate. If you select Increase page views you must choose a page to measure.

2. Assign traffic – Here you can choose how many % of visitors you want to get to each variant. If you want 50/50 there is a button to help with that.

3. Automated actions (optional) – here you can setup what happens “If there is a winning variant” and “If test is inconclusive“. It could be that it automatically sets the winning variant as the new main and sends all traffic to that. Or you could choose not to. Same if the test is inconclusive, you could set that it should keep running the test or end it and send all traffic back to the control.

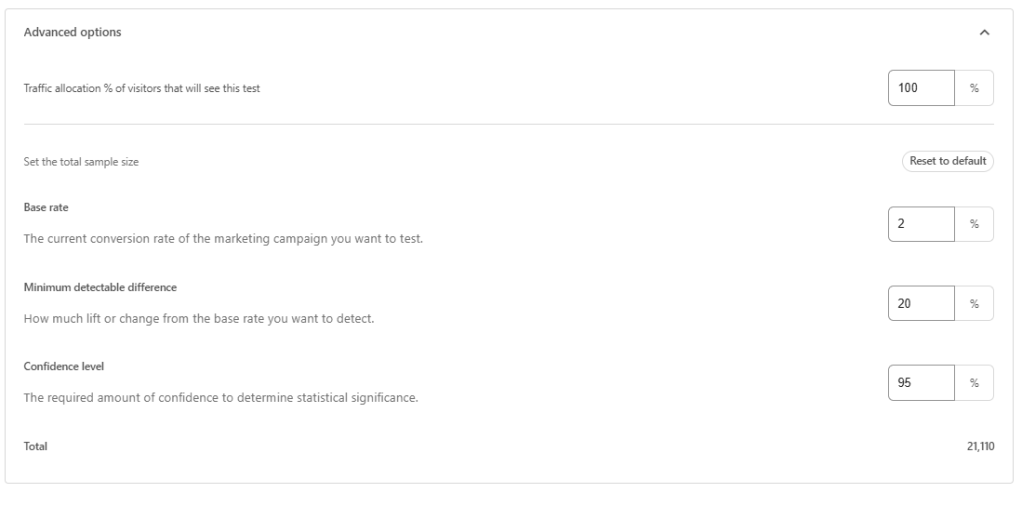
4. Advanced options (optional) – Here you can set more granular control over the test like

– Traffic allocation (how many visitors will be exposed to the test itself). For example, setting this to 20% means only 20 out of every 100 visitors will participate in the test.
– Base rate. Increasing the base rate decreases the required minimum sample size. 
– Minimum detectable difference. Increasing this value decreases the required minimum sample size, but also makes the test less sensitive
– Confidence level. This is the level of certainty required to confirm that differences between variants are statistically significant. A 95% confidence level is the accepted standard, meaning you can be 95% confident the results are accurate and not due to luck.

The default is a pretty good overall setup and only if you’re confident you could mixture with these settings.
Always run a test for the total sample size (Total in the bottom) for a valid test.

Troubleshooting note: If you can see the vial icon but can’t press it you probably have personalization setup on the page (I talked about that in my previous post, they can’t coexist on the same page).
If you can’t see the Icon at all you’re probably on the wrong JSS versions or missing packages in metadata.
You need to be on at least JSS version 22.1.0 and it needs to have metadata with all installed modules that start with @sitecore. You can get this information by requesting this endpoint: api/editing/config.

Go to Dev tools in your browser, go to network, filter on “api/editing/config”. In the response you should see the json with packages that start with “@sitecore”. If you’re missing any required package Sitecore won’t show the icon.

Atleast need sitecore-jss and sitecore-jss-nextjs (or react if your on that). Unsure if you specifically need others to make it appear.

  • @sitecore-cloudsdk/core: “<version number>”
  • @sitecore-cloudsdk/events
  • @sitecore-cloudsdk/utils
  • @sitecore-cloudsdk/personalize
  • @sitecore-feaas/clientside
  • @sitecore-jss/sitecore-jss
  • @sitecore-jss/sitecore-jss-dev-tools
  • @sitecore-jss/sitecore-jss-cli
  • @sitecore-jss/sitecore-jss-nextjs
  • @sitecore-jss/sitecore-jss-react
  • @sitecore/byoc
  • @sitecore/components

If you want to get detailed information read more on Sitecore Documentation here: https://doc.sitecore.com/sai/en/users/sitecoreai/a-b-n-testing.html

Sitecore docs AI and MCP

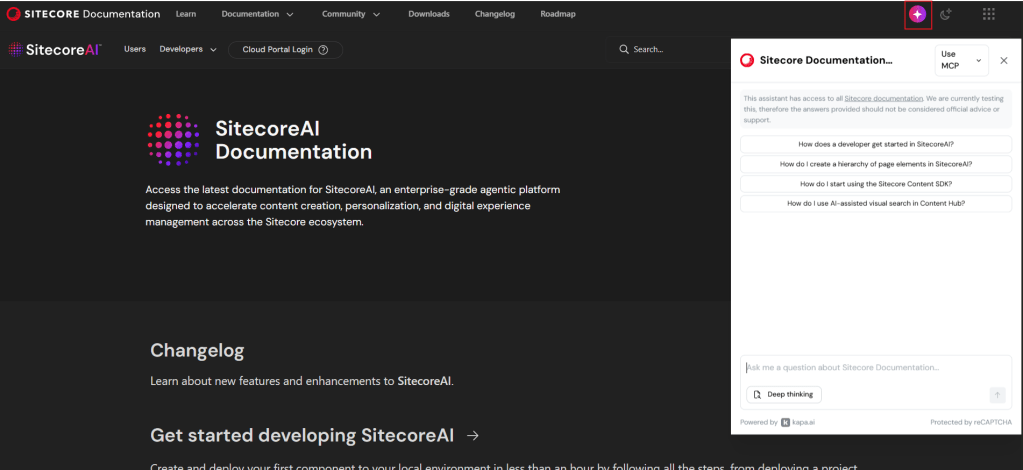
Did you know Sitecore Docs has a new AI feature that you can talk with a LLM chat that has been trained on the Sitecore documentation?

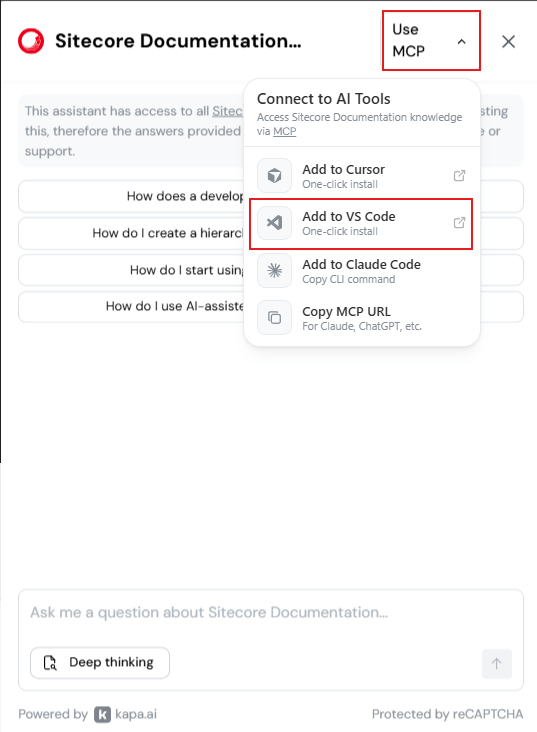
Just go to https://doc.sitecore.com/ and press the Icon in the header, marked in the picture, and you can start asking it questions.

Sitecores documentation has greatly improved the last years, not only in quality, but also in quantity. Sometimes it can be hard to find the right place to look at. And with this AI chat tool you can find answers fast!

There is also an MCP server you can connect to.
To add the MCP to your VS Code you can do following, or Cursor etc:

You can now also use the MCP in context with your code repository to get even more context for your question.

A short post but it gives huge impact, and fast!

NOTE from Sitecore:
“This assistant has access to all Sitecore documentation. We are currently testing this, therefore the answers provided should not be considered official advice or support.”

SitecoreAI – AI Translation

Translate a page or even translate an entire site from one language to another is a powerful yet simple to use tool in SitecoreAI.

Lets break it down.

First lets talk about Brand Kits

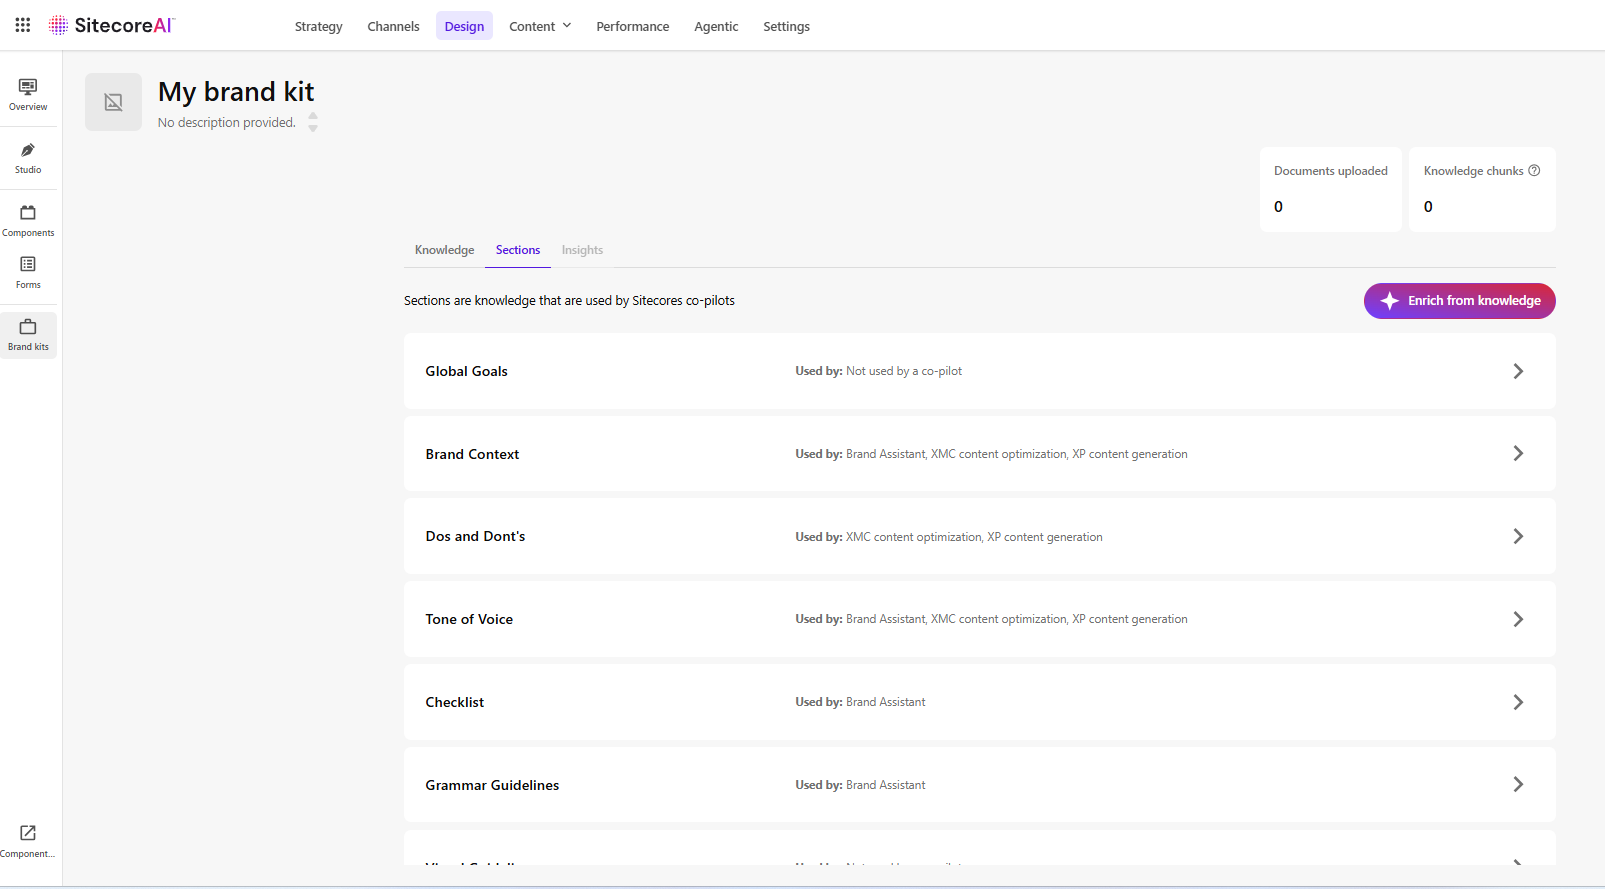
Brand Kits allow marketing or communication teams to configure how AI should generate content within Sitecore.

brand kits in sitecoreAI

By creating Brand Kits, organizations can define instructions and brand guidelines that AI features in SitecoreAI will follow. When editors then use AI functionality they can select a Brand Kit. Brand kits provide:

  • A centralized location for brand instructions
  • Reusable configuration
  • Consistent tone and messaging in your content

By default, administrators can see all brand kits, but they have the power to grant users access as needed to specific brand kits. This is very important and good feature!

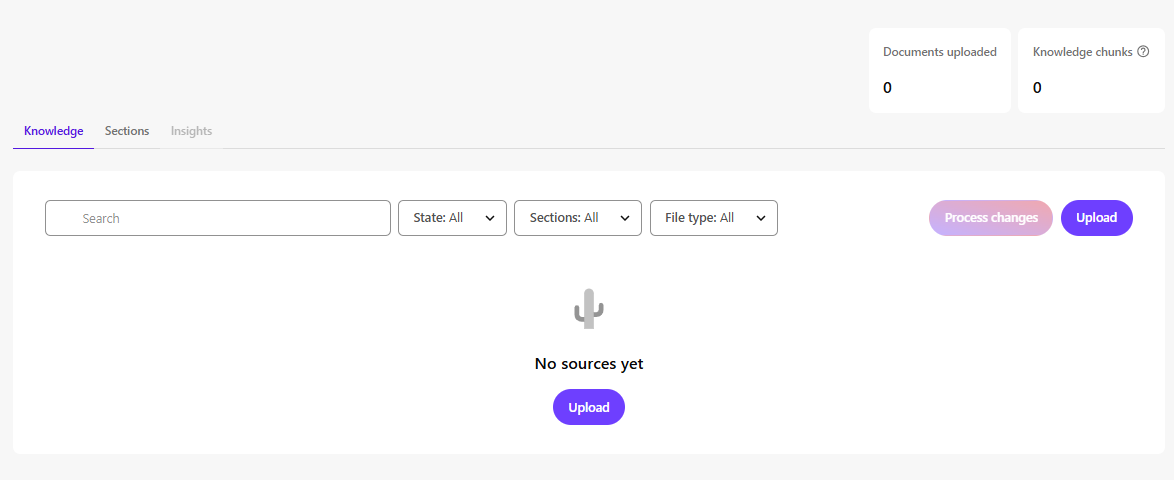
Knowledge

Within a Brand Kit, the Knowledge tab allows you to upload documents that help build your brand knowledge base. Basically if you upload documents here SitecoreAI will populate the otherwise empty sections on the Brand Kit based on those documents.

Examples of supported documents:

  • Brand books
  • Visual guidelines
  • Style guides
  • Graphic manuals

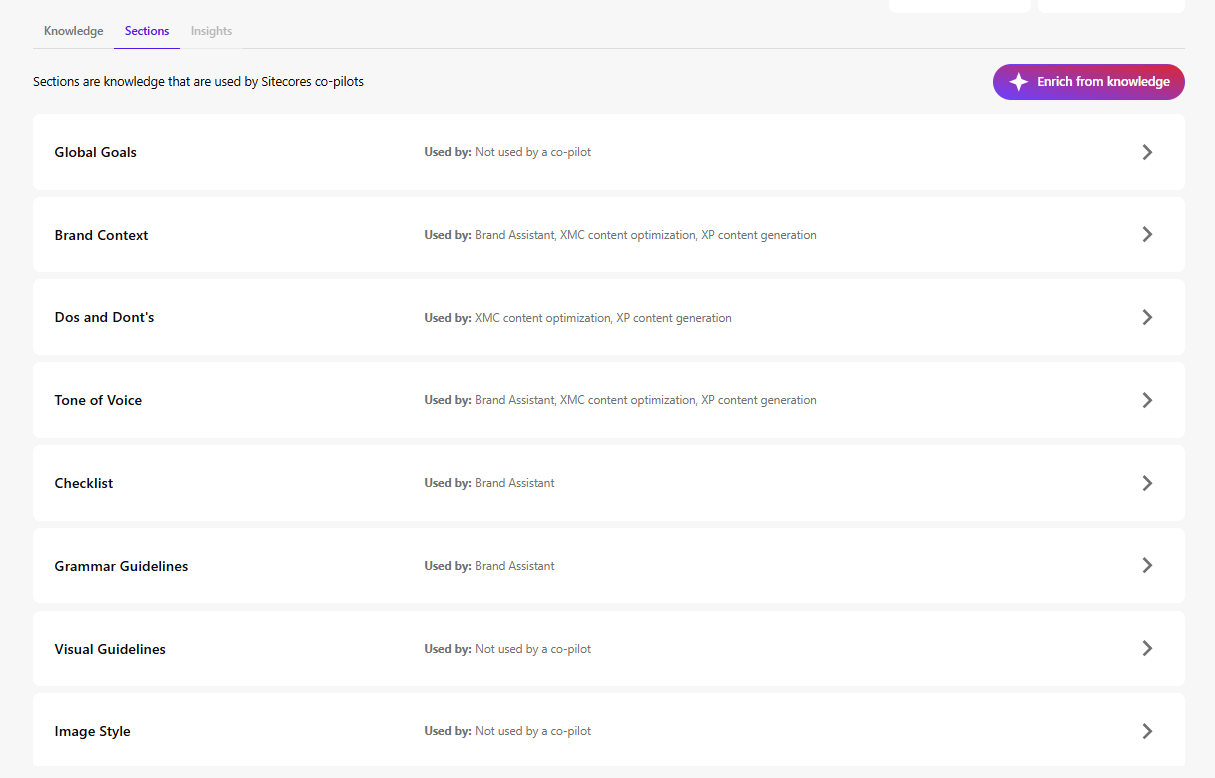
Sections

In the tab Sections, you can setup the configuration of the kit.

Sections can be populated using the uploaded Knowledge documents (via the button in the top-right corner). However, you might want to look over and edit these if needed. It provides a strong starting point, but manual refinement is typically required.

Examples of sections include:

  • Brand Context – Describes your brand’s purpose and positioning
  • Do’s and Don’ts – Guidelines ensuring AI-generated content aligns with tone and values (e.g., formal, academic, relaxed)
  • Tone of Voice – Attributes such as friendliness or confidence that define brand personality

You can setup multiple Brand Kits and use them for different goals, like campaigns, audience etc.

Brand Kits are not required to use translation features, but they can significantly improve consistency and quality.

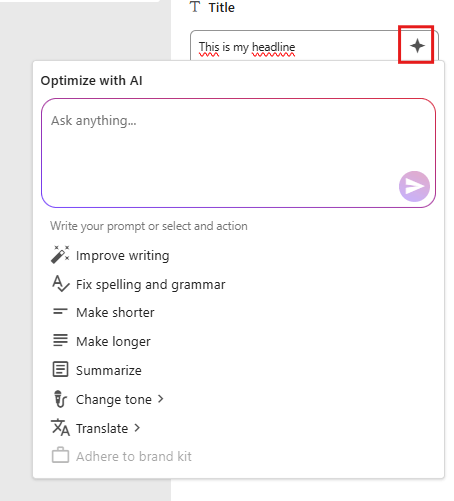
Inside Page Builder, several built-in AI tools support Brand Kits. Like this image below, you can select a field you want to edit, click the “Optimize with AI”-button in red. Here you can use the prompt, translate, or adhere to a brand kit.


Agentic Studio – Translation assistant

The Agentic Studio is a centralized place for AI agents, which helps to automize work for you. There’s a ton of out-of-the-box agents from Sitecore, and one of them is the Translator, which allows you to translate content to multiple languages at the same time while keeping the Brand context.

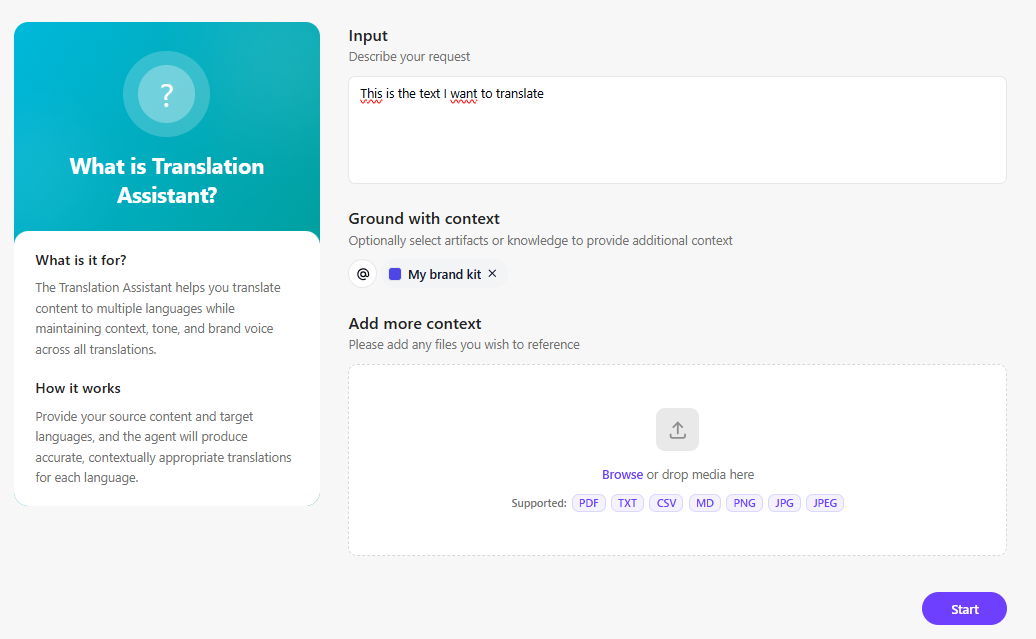
This is the first interface of the Translation Assistant. You have your input, then you can add context; in this case, I’ve added my Brand Kit as context to get the tone of voice, etc., that I’m interested in. You could also add more context to the translation if you wish.

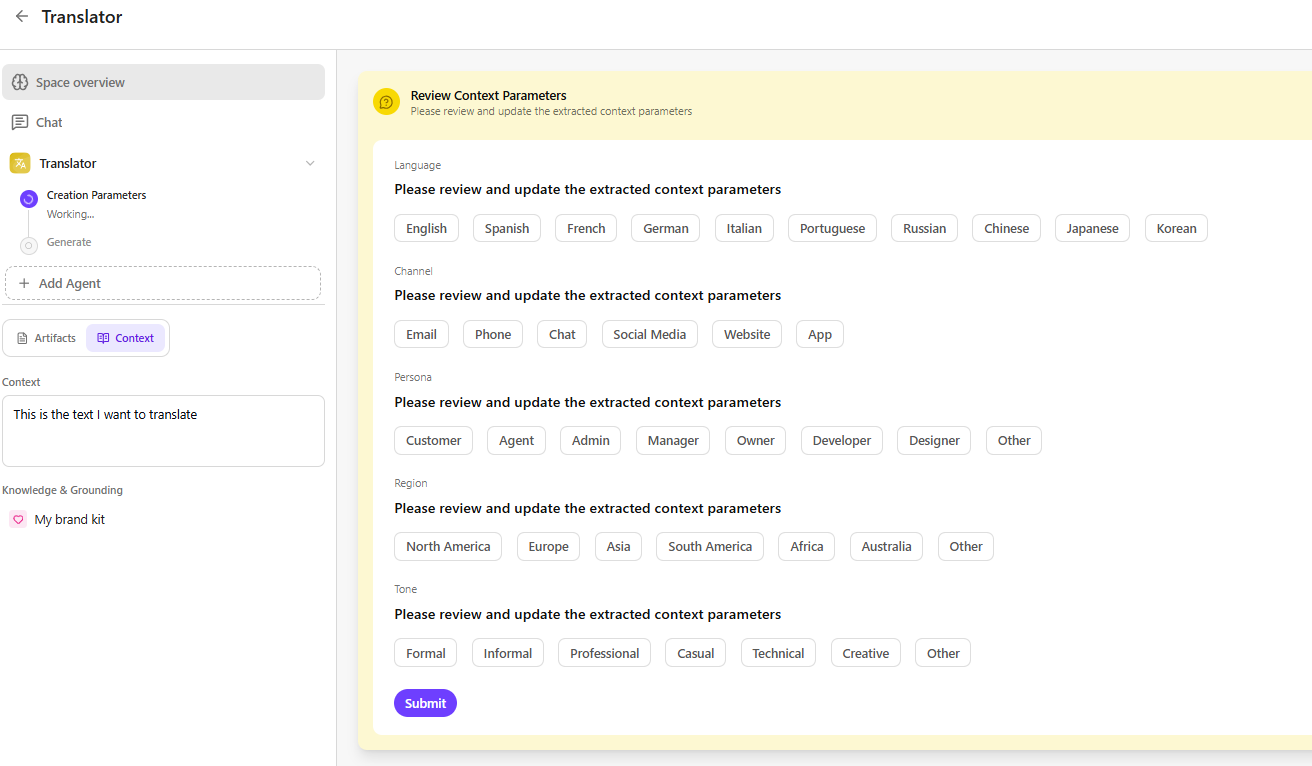
Then we get this window. Here we can set the desired parameters for this translation job. Like selecting which languages, persona, tone etc. Then the artifacts are created for each translation for you to use.


Page translation

This is maybe the highlight of this blogpost. This functionality does not require Brand Kits.

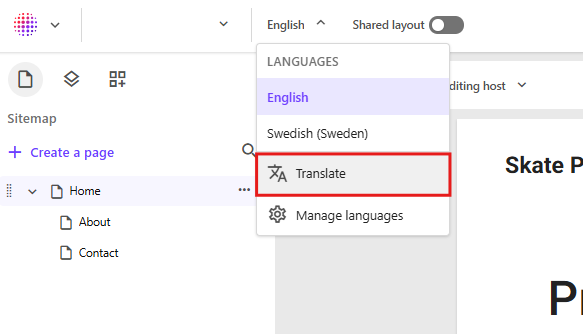
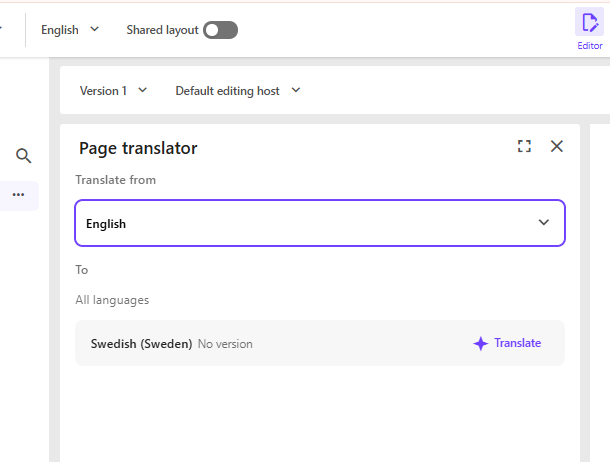
For example, you can navigate to a page that has been created and setup content in English. In the language dropdown at the top of Page Builder, select Translate.

A dialog will appear allowing you to choose one of the available site languages. The system will then traverse all references and related items in Sitecore for that page and generate, for example, a Swedish version. All text content will be translated, display names on items will receive a Swedish version, and image alt texts will also be translated if an alt text exists.

The following field types are translated:

  • Single-line text
  • Multi-line text
  • Rich text
  • General Link (link title, link text)
  • General Link with Search (link title, link text)
  • Image (alt text)

Shared fields are skipped. These are template fields marked as SHARED, since they are identical across all language versions.

Choose source language and then click Translate on the desired language. Note that your language only pops up here if it’s configurated for the site.

Site translation

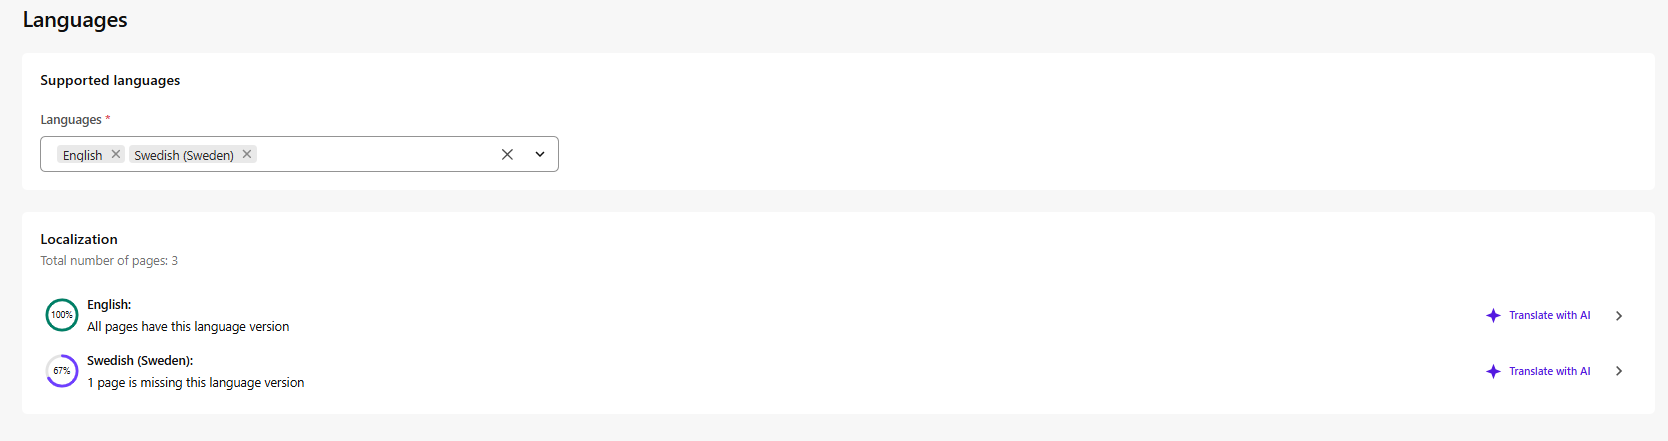
If you instead go to manage languages from page builder you will get to this language page, here you have the button “Translate with AI” which does the same as the page translation but for the entire site. Very powerfull stuff!

The full site translation functionality is available for admins or Sitecore Client Site Managing roles.


That’s what I wanted to go over with Sitecore AI translation and some info on the Brand kits also if you’re interested in that.
Hope this helps!

SitecoreAI’s A/B/n Testing: Optimize Your Website Today

A/B/n testing is a powerful tool used to understand which content engages your visitors the most. I’ll explain the concepts, share insights on how to get started, and what to consider when working with SitecoreAI’s A/B/n testing.

What is A/B/n testing and why is it important?

A/B/n testing is about comparing different versions of a webpage or a content element to see which version performs best. By formulating a clear hypothesis, for example, that a new color or text of a CTA button will increase page views by 10%, you can make data-driven decisions that improve user experience and conversion rates.

What is the difference between A/B testing and A/B/n testing?

The main difference between A/B testing and A/B/n testing is the number of versions, so-called variants, being tested.

A/B testing compares two variants, while A/B/n testing evaluates multiple variants simultaneously. An A/B test is a simple comparison between two options and tests a specific change to determine which performs better. An A/B/n test evaluates several design options, layouts, or headlines at the same time and provides a faster overview of which of many ideas works best.

What distinguishes SitecoreAI from traditional A/B testing tools?

SitecoreAI differs from traditional A/B testing tools in that it is tightly integrated with the entire Sitecore ecosystem and can use artificial intelligence to optimize tests. This includes:

Faster insights: SitecoreAI helps analyze results in real time and can identify winning variants faster than manual testing. With SitecoreAI, you can compare up to six variants.

Automation: You can configure rules to automatically direct all traffic to winning variants once results are statistically significant, reducing manual work.

Integration with Sitecore: Because the testing tool is built into the platform, you can easily connect A/B/n testing to other Sitecore features, such as forms and content management, without needing external tools.

Effective default goals: SitecoreAI comes with predefined goals (e.g., page views, form submissions, bounce rate) that make it easy for marketers to get started quickly without advanced statistical knowledge.

In short, SitecoreAI makes it possible to combine A/B/n testing with AI-driven insights in a way that is difficult to achieve with standalone testing tools. It saves time, delivers more accurate results, and simplifies optimization of the entire website.

How A/B/n testing works in SitecoreAI

First, you develop a hypothesis for your test. For example, reducing the number of fields in a form may increase form submissions by 10% compared to the current version.

Based on your hypothesis, you define the test goals. SitecoreAI includes predefined standard goals:

  • Increase page views
  • Increase form submissions
  • Reduce bounce rate
  • Reduce exit rate

You then create a control variant (Variant A) and a test variant (Variant B) and split traffic between them, either 50/50 or using another distribution you decide. As mentioned, you can create up to six variants.

You determine how long the test should run, but Sitecore recommends running it for at least one week to ensure statistically significant results.

SitecoreAI then provides insights into which variant performed best, or whether there is no difference (a null result). You can configure the system so that the winning variant automatically receives all traffic, or if results are inconclusive, that the test is extended or traffic is reverted to the original variant.

What you can test

Anything you can change on a page or in a form can be tested. Examples include:

  • Content: Images, CTA copy, headlines, and components
  • Sitecore forms: Number of fields, button placement
  • Design and layout

Tips for effective testing

  • Change as few variables as possible at a time. This makes results clearer and easier to interpret.
  • Prioritize areas of the page with the greatest impact, such as hero banners or purchase buttons.
  • Run tests regularly to account for changes in visitor behavior over time.
  • Set a confidence score (e.g., 95%) to determine when a winning variant should receive all traffic.
  • Note that A/B/n testing does not work simultaneously with personalization. Because personalization shows different content to different users, it can conflict with the purpose of the test. If you want to run an A/B/n test on a personalized page, the solution is to temporarily pause personalization while the test is running.

Unexpected Lessons from Warhammer 40K and SitecoreAI

warhammer

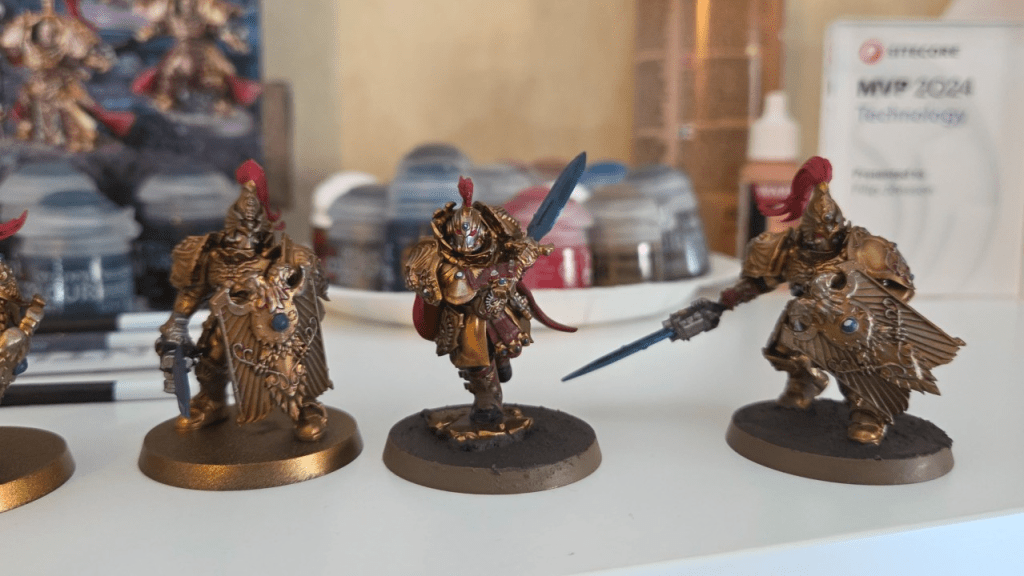
I know I did, and after 15 years, I even picked up and old hobby of mine: Warhammer 40k

I spent months researching which faction to start with. Read up on their strengths, what would be most fun to paint etc. It required a lot of thought, because I wanted to invest in the right army for me and what I thought was important.

At some point I thought, just for fun: “I wonder if there are any similarities between this and Sitecore AI?”

So here’s the comparison.

1. Choosing a faction – Choosing a system

Before investing in a faction or a system you evaluate its strengths and weaknesses. The complexity, flexibility, long-term viability, limitations etc.

Is this the right choice for what I find important? These are things we look for when choosing our technical platforms. This is also why platforms like Sitecore work so well: they reward teams who know what they want to achieve.

2. Design and paint -> Web design and experience

Painting is a huge part of Warhammer, just like design and user experience, both for editors working in the system and the final experience where visitors interact.

For instance, a well executed design doesn’t necessarily mean it fits its purpose.

You can paint something amazing, but still in a way that clashes with the established theme or identity of the faction. The same applies to web design: just because something looks good doesn’t mean it serves its intended purpose. Design without intent is decoration.

3. Assembling the models -> Building the solution

Assembly mistakes are hard to undo, on both sides. Poor structure has implications further down the line.

It takes time to build something good and long lasting, and shouldn’t be rushed. Yes, implementations move faster today with all available tools and AI, but they don’t eliminate the need for a solid foundation. Speed should not come at the cost of structure.

4. Strategy in use – Strategy in reality

Strategy sets direction. It’s how you use your army/platform that matters most.

With SitecoreAI there are endless possibilities, therefore a good strategy is key. As a Warhammer beginner, I lean on experienced players. With Sitecore, you can do the same by working with experienced partners. And in today’s landscape, adaptation is just as important as having a plan.


Warhammer reminds me that good outcomes are rarely accidental.

They come from:

  • Choosing the right foundation
  • Designing with intent
  • Building carefully (not slow)
  • Letting real-world usage guide strategy

Track SitecoreAI Updates: Changelog Insights

If you don’t already follow the changelog, make sure to track the RSS feed. Since SitecoreAI is constantly getting updates and improvements to Page Builder, SDKs, etc., you really should follow the changelog so you can easily see when new features are released, start using them, and inform your editors. https://developers.sitecore.com/changelog

I thought I’d sum up some of my favorite features and improvements released the last couple of weeks. Not in any particular order

Blok Design System reaches General Availablity (GA)

This is Sitecore’s design system to ensure a consistent look throughout SitecoreAI. I’ve used the Beta when trying new marketplace apps created with the new Marketplace SDK that came earlier this year.
It makes it really easy and the design matches rest of SitecoreAI which makes it look professionally integrated quickly and easy. With this realese it’s now ready for production.

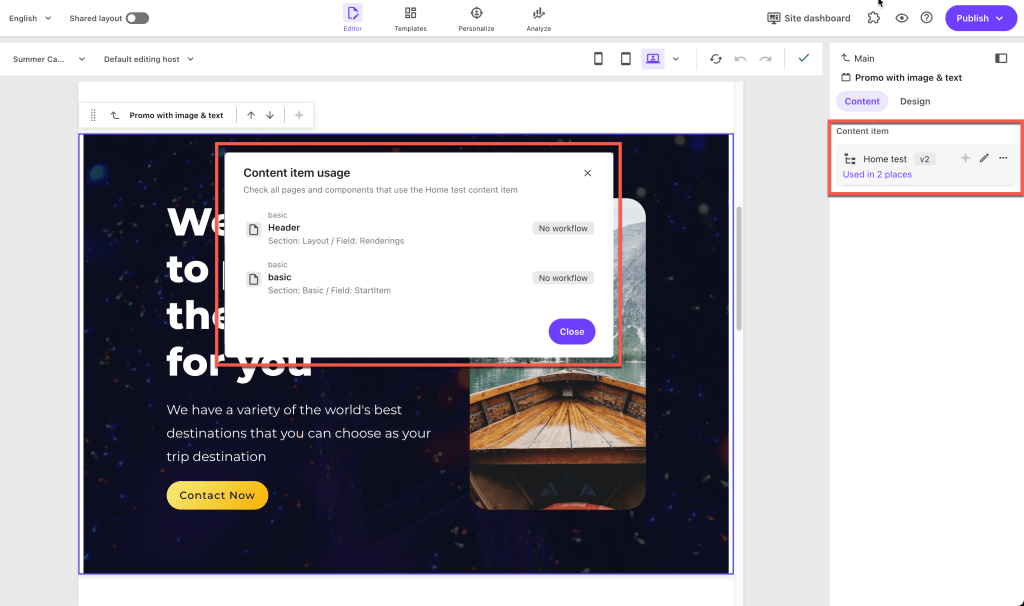
See where your content lives

This brings clarity for editors working in Page Builder. I was working on a marketplace App to give editors more tools in Page Builder, and this was one of the features I had in mind. It’s great that it’s now incorporated in by Sitecore as a default feature.
We want our editors to be able to works as much as possible in Page Builder without having to switch to Content Editor unless needed. This is a step in the right direction.

Improvements and resolved issues for the Page builder

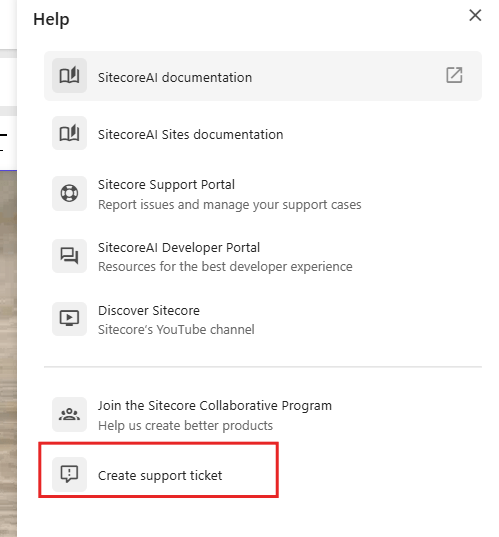
Create support tickets directly from Page Builder, insert link now respects cross-site linking is disabled, but most important maybe is that items deleted in Page Builder now ends up in the recycle bin as expected instead of being instantly deleted.

A nice touch for clarity is that it now says Unpublish if you set a publish restriction on a page, and it removes the page from Edge when triggered.

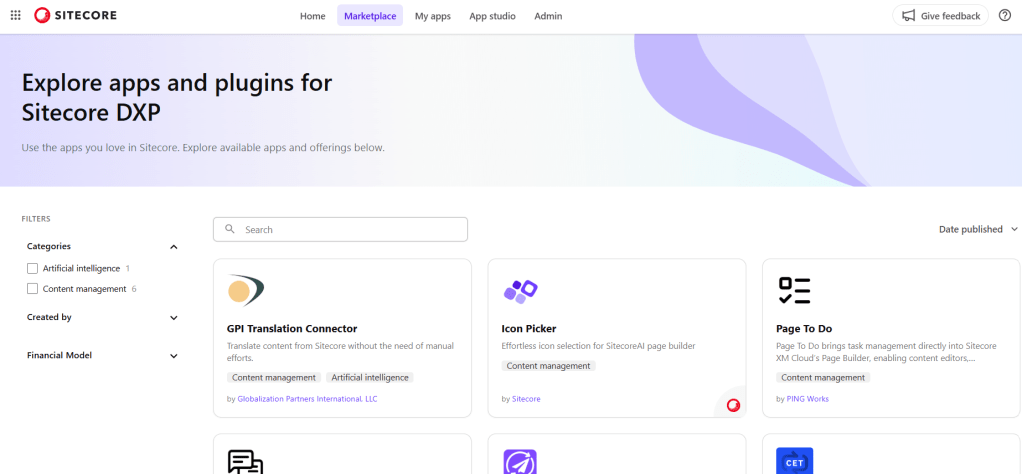
Share your solutions with the Sitecore community through public Marketplace apps

Marketplace apps can now be made public. When you’ve created an excellent app, you can submit it to Sitecore for review, and if it meets the standards, it can be published for all SitecoreAI to discover and use in the Marketplace. You can choose a free, freemium, or paid tier for your app.

New Search feature and other improvements in the Page builder

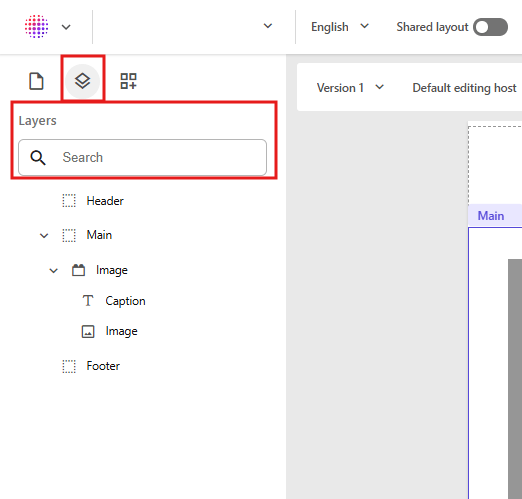
In a previous release we got the Layers tab in Page Builder in the left-hand pane. This makes it easier to see all components on your page in the correct order. You can also click a component in the tree to instantly focus that component or field in your editing window.

If you have lots and lots of components on your page, you can now search for specific names to filter out the otherwise long list.

Summary

These are just a handful of updates that have come to SitecoreAI. There are tons more like Sitecore Agentic Studio, Sitecore Marketer MCP and many more.
Make sure to follow the changelog, because SitecoreAI is evolving fast and you don’t want to miss out on new features and improvements!

https://developers.sitecore.com/changelog