I need to get items from a big bucket. For best performance you should get the items through Sitecore ContentSearch.
Here I have some example code how to get a selection of items from a bucket. Let’s say I want to get items that has a specific Tag on a field, which in this case is a string type field. (You can of course change the queryable to whatever you like)
List<Item> ResultsItems = new List<Item>();
IIndexable index = new SitecoreIndexableItem(bucketItem);

using (var context = ContentSearchManager.GetIndex(index).CreateSearchContext())
{
   var results =
     context.GetQueryable<T>().Where(x => x.TagFieldName.Equals("TagName"))).GetResults();

   foreach (var result in results)
   {
     Item item = result.Document.GetItem();
     if(item !=null)
     {
       ResultsItems.Add(item);
     }
   }
}
Now ResultsItems are filled with the item context of all the children of the bucket.
Note: I’m showing the code for demonstration purpose. Beware of potentially calling a GetItem() on potential thousands of items. I would also recommend selecting the fields you are after with .Select(i => new { i.FieldA, i.FieldB}) (read more here) so that the query gets smaller.
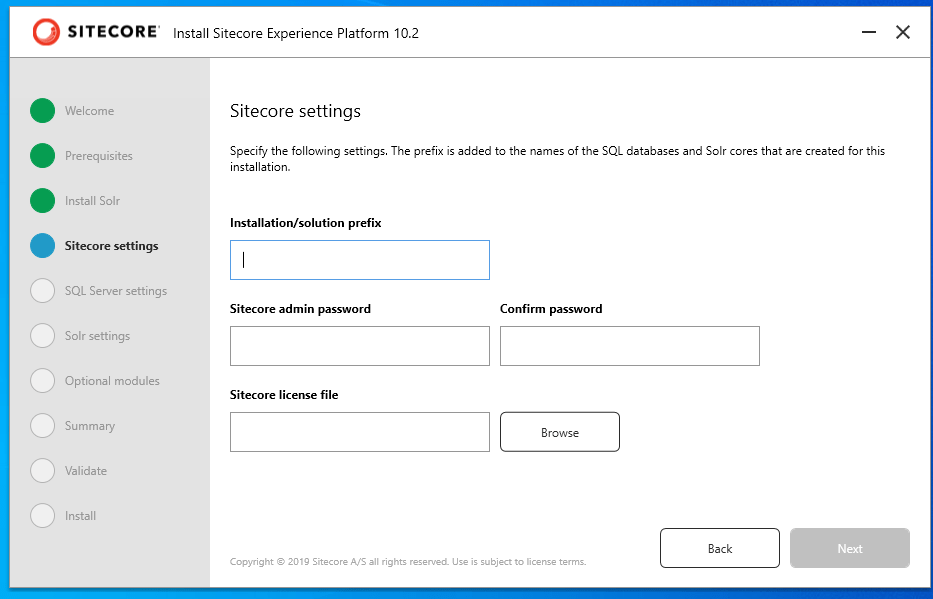
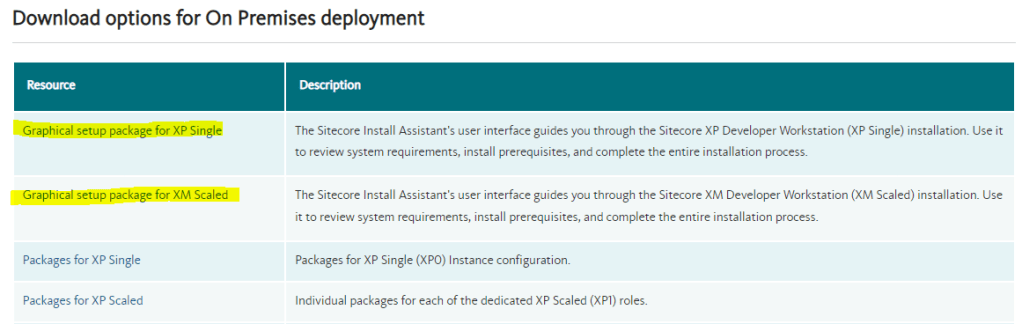
Just had to make a quick post about this because apparently I’ve been living under a rock. I’ve used SIF and setting up configs on my own every time I’ve setup a new sitecore instance. Which now in hindsight has been a giving lesson to learn the basics.
I mean if you’re just after a quick install for an empty Sitecore instance this is golden. So this is for all others that have missed this too.
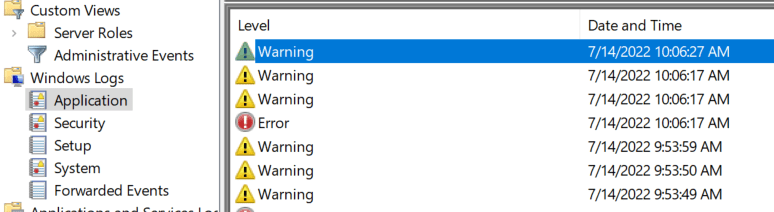
The problem: All I could see in the log file was that error message “sitecore shutting down – initialization error“. This didn’t tell me much of where the issue was coming from except when Sitecore is spinning up.
So I took a look in the Event viewer to check out any logs there. Open “Event Viewer” by clicking the “Start” button. Click “Control Panel” > “System and Security” > “Administrative Tools”, and then double-click “Event Viewer”.
Go to Windows Logs -> Application and you’ll see the latest log inputs at the top.
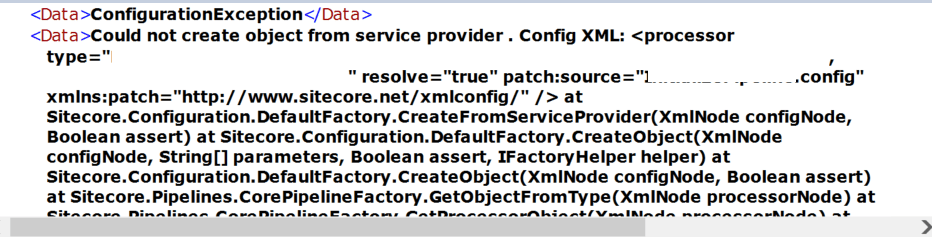
Click it and read the details. There I saw my problem.
It was a config file that was hooking into the initialize pipeline and had a faulty dependency. Whops. Fix that and bada boom, Sitecore starts to spin up again.
“InfluxDB is an open-source time series database (TSDB) developed by the company InfluxData. It is written for storage and retrieval of time series data in fields such as operations monitoring, application metrics, Internet of Things sensor data, and real-time analytics.” – Wiki
So it’s a perfect tool to save a bunch of data and use in fancy graphs or diagrams (or excel…). I for one love this.
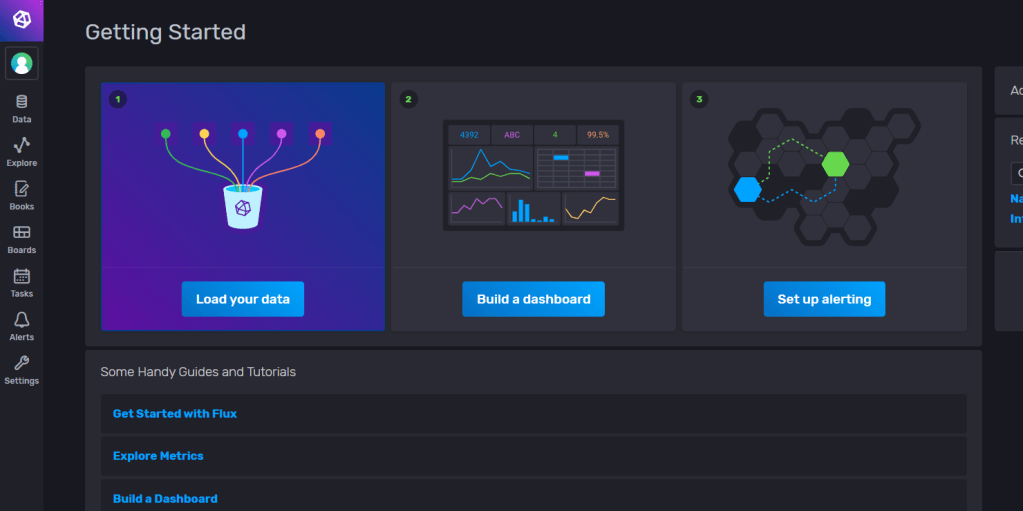
So how can we use this with Sitecore?
In this first part i’ll show how we can monitor our Sitecore’s Solr instance and use the graph dashboard built-in for InfluxDB. In a later part I will show how we can query or write to influxDB for data and present it in Sitecore.
I’m using this as an example to hopefully inspire some ideas of your own.
In InfluxDB there are lots of plugins you can install to monitor your Solr, MongoDb etc. I’m going to show how you can easily setup and monitor your Solr instance with InfluxDB.
But the options are endless, you could save the data and present whatever data you want in fancy graphs. For example, you want to collect Sitecore editor data on item events by hooking up to the events pipeline. Or make diagrams of graphs when visitors hit your 404-page.
1. Install InfluxDB
I’m using the Windows Open Source version. Follow the installation guide here.
You need to run the influxd.exe and go to your http://localhost:8086/ (the default port) and there you can set up your organisation, bucket, and user in the interface.
Bucket: Think of this like a database. It’s not really but just to get an idea.
Organisation: This is your identifier for you influx application
Telegraf is an open source plugin-driven server agent for collecting and reporting metrics. It enables flexible parsing and serializing for a variety of data formats (such as JSON, CSV) and can serialize the data in InfluxDB. It enables some +300 plugins that you can use with InfluxDB.
Go to where you downloaded telegraf and open the telegraf.conf
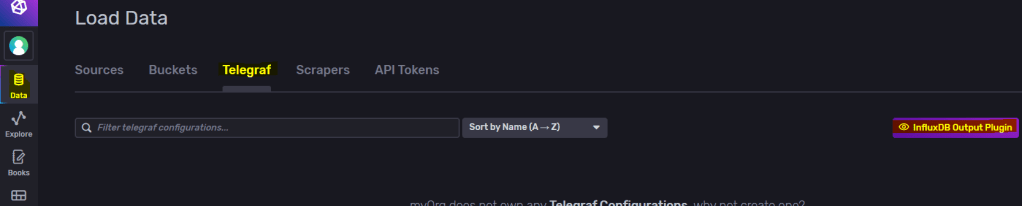
Start up your influxdb and go to the dashboard, from there go to “Data -> Telegraf -> InfluxDb Output Plugin“.
Copy to clipboard and replace this section in your telegraf.conf file to match your influxDB setup. Generate Token if needed or use your existing one.
Find # [[inputs.solr]] in telegraf.conf and uncomment so your section looks more like this and save.
# # Read stats from one or more Solr servers or cores
 [[inputs.solr]]
#   ## specify a list of one or more Solr servers
   servers = ["http://localhost:8983"]
#
#   ## specify a list of one or more Solr cores (default - all)
   cores = ["main"]
#
#   ## Optional HTTP Basic Auth Credentials
   username = "username"
   password = "pa$$word"
And set the servers, cores and credentials so it matches your solr instance.
As the documentation shows, if you’re installing on windows it needs to be installed as a service.
You can test your connection with: .\telegraf.exe –config “<yourPath>\telegraf-1.23.0\telegraf.conf” –test
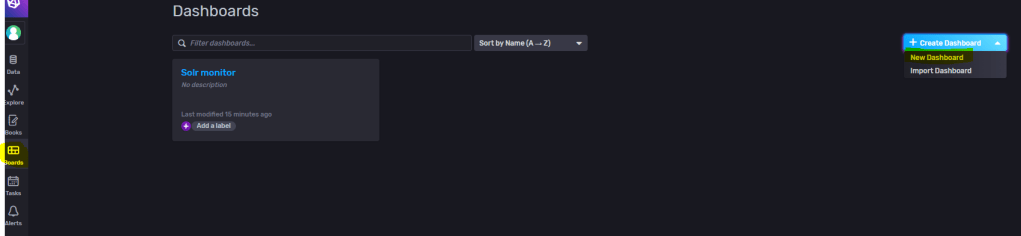
4. Setup Dashboard in influxDB
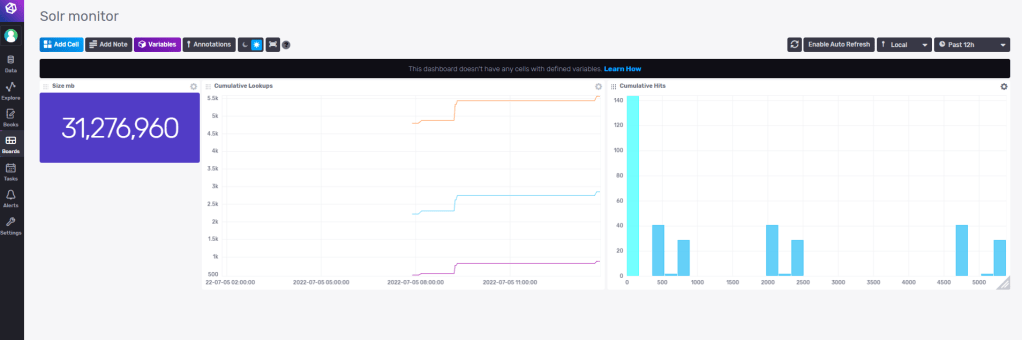
Go to Dashboards and create a new Dashboard. Name it then add a cell.
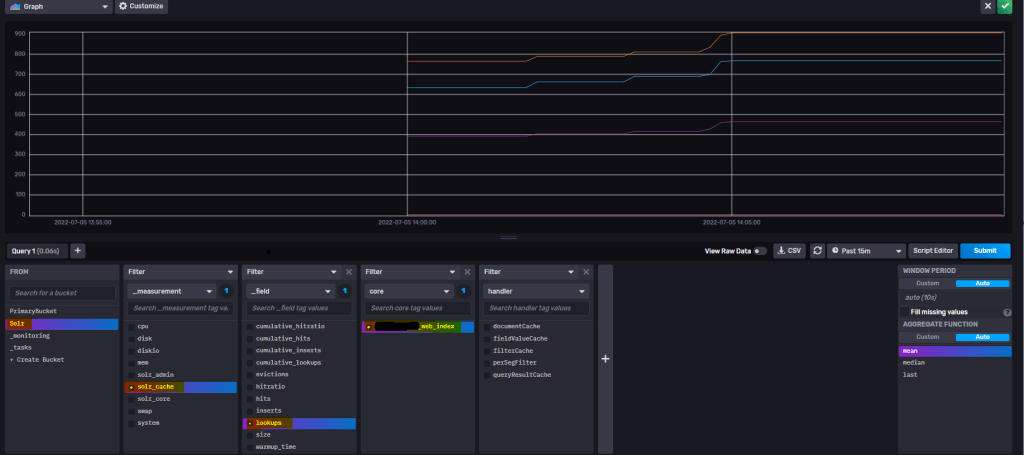
Here I’m adding a query to the “lookups” field on my selected core. Then press top right to save it.
You can set the cell names also.
So with some experimenting I’ve now setup some monitoring for my Solr instance with some simple cells. When you get more knowledge how to work with influxDB you can build and merge cells with different queries to present more valuable data. You could also open up InfluxDB to other users on your server now or setup alerts etc.
Other sources of information
Templates Here you can find community made templates for influxDB like
monitoring your Redis Server
view data for your MongoDB
monitoring your docker containers
and many more. Check it out!
Hopefully you found this information useful and inspiring.
Stay tuned for Part 2 where I’ll get into some more in-depth how to write and query to influxDB for Sitecore related data.
Now i’ve gotten the result down to 4k instead of 140k just by the the last part where we check if categories has anything with $filter=Product/Categories/any()
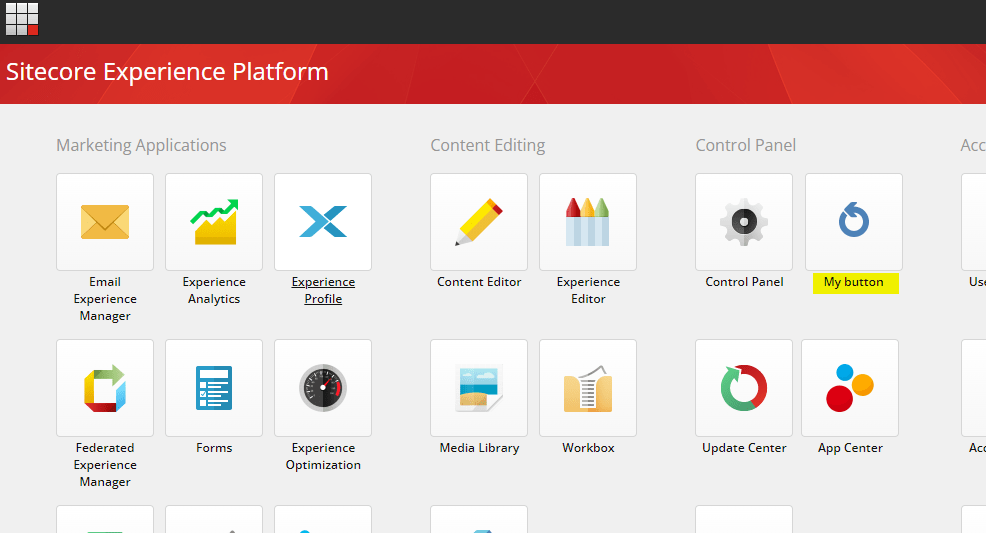
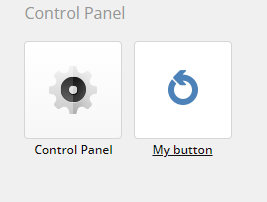
A neat way to execute or show some custom functionalities is to create a custom button for the Sitecore Dashboard/Launchpad (whatever you call it, I say Dashboard). This is very simple and you can easily make the button either for example
a) open an aspx b) show custom views c) make an API request to one of your controller actions
Here i’ve added “My button” to the Control Panel section
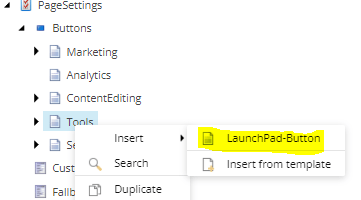
Step 1
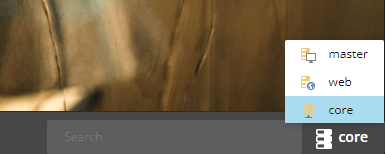
Switch to Core database by going to the Desktop view and in the lower right corner switch database. (Or enter the querystring &sc_content=core) Then enter the Content Editor
Step 2
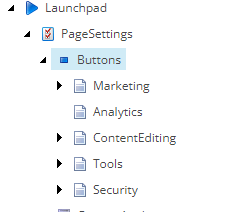
Locate /sitecore/client/Applications/Launchpad/PageSettings/Buttons and you will find the sections corresponding to the Dashboard/Launchpad
Step 3
Choose what section you want to put your button in and right-click the item (Tools = Control Panel) and add a new Launchpad-button
Step 4
Fill in the button as you want. Text: The text for the button on the Dashboard/Launchpad Icon: Icon for the button Link: You can link directly to a Sitecore Item or a controller action within the sitecore api as i’ve done. (or your own api) OpenNewTab: Clicking the button opens it in a new tab. OpenIframe: Clicking the buttons opens an iframe. PathResolver: Namespace and dll name
That’s it. It should now show up on the Dashboard/Launchpad
I needed to replace swedish characters from string without removing the character for itemname.
With Sitecore you can use ItemUtil.ProposeValidItemName() but it removes the invalid characters. I have a text like “Flöde” and I want it to be “Flode” and not “Flde” like Sitecores ItemUtil does.
The ItemUtil.ProposeValidItemName will give you a valid item name for Sitecore. The string output would still contain possible invalid special characters that you don’t allow in the Sitecore config setting ItemNameValidation regex.
Performance is key. We have all know this. Customers has very high expectations on fast solutions. And this is where caching is king.
There are many caching soultions out there today, like Reddis cache. You can also build your own layer if you’d like. Or you can use Sitecores.
Sitecore has their own caching framework that is used for Sitecore to get data faster. This can also be used for custom caches. So you can cache something simple as a string or even anonymous objects.
There are two types of cache you can use for customcaching.
Sitecore.Caching.CustomCache<string> and Sitecore.Caching.Generics.Cache<T>. One takes a string and one takes an object type.
Sample code
   var mycache = new Sitecore.Caching.Cache("test cache", 1024);
   mycache.Add("key", "data");

   var myType = new Type {Id = 1, Name = "Test"};
   mycache.Add("type", myType);

   //Get the value based on key
   var value = mycache.GetValue("type");
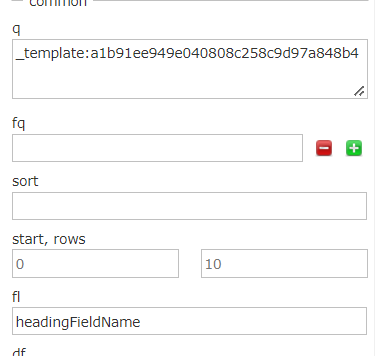
If you’re expecting a lot of results from a Solr query, it can be quite a perfomance hit. If you then only really need 1 or 2 fields from the document, there is a neat way with LINQ to Sitecore to select only the fields you need.
var items = searchContext.GetQueryable<BaseSearchResultItem>().Where(i => i.TemplateId == <templateid>).Select(i => new { i.Heading, i.ItemId }).ToList();
By using the .Select() you can specify which fields you want to get from the document. This query will result in a Solr query like following:
This error message caught my eye on xConnect in Sitecore 9.3, which looked like this.
"[Error] Sitecore.XConnect.Operations.GetEntityOperation`1[Sitecore.XConnect.DeviceProfile]: Sitecore.Xdb.Collection.Failures.DataProviderException: A network-related or instance-specific error occurred while establishing a connection to SQL Server. The server was not found or was not accessible. Verify that the instance name is correct and that SQL Server is configured to allow remote connections. (provider: Named Pipes Provider, error: 40 - Could not open a connection to SQL Server) ---> System.Data.SqlClient.SqlException: A network-related or instance-specific error occurred while establishing a connection to SQL Server. The server was not found or was not accessible. Verify that the instance name is correct and that SQL Server is configured to allow remote connections. (provider: Named Pipes Provider, error: 40 - Could not open a connection to SQL Server) ---> System.ComponentModel.Win32Exception: The system cannot find the file specified"
This issue was because of Xdb had wrong ServerName in the [*.Collection.ShardMapManager] database.
The database and table “[*.Collection.ShardMapManager].[__ShardManagement].[ShardsGlobal]” that contains [ServerName] and [DatabaseName] columns. Replace with your ServerName and hopefully this will be the issue in your case.
Hope this helps if you get a similar error.
Is this your new site? Log in to activate admin features and dismiss this message